Add & Manage Users in Roadmunk
This feature is only available to Account Administrators.
Overview of Adding & Managing Users
Once you've selected a plan and purchased licenses, you can begin to invite and assign users to those seats. When you add a user, they will receive an invitation email from noreply@roadmunk.com with a link to activate and set up their account.
Each user you add is assigned one of three roles:
Account Admin: A user with a Collaborator-type license, but with enhanced administrator capabilities in the application. This user can access and view all content on the account and manage the account setup & distribution of user licenses for the team.
Collaborator: A user with a Collaborator-type license. These users can create, update, and view any roadmaps which they've built or have had shared with them. They can also view and manage Feedback & Ideas within the Product Areas they've been assigned to.
Reviewer: A user with a Reviewer-type license. These users have a limited amount of access, where they can view any roadmaps which have had shared with them and can contribute Feedback to the application.
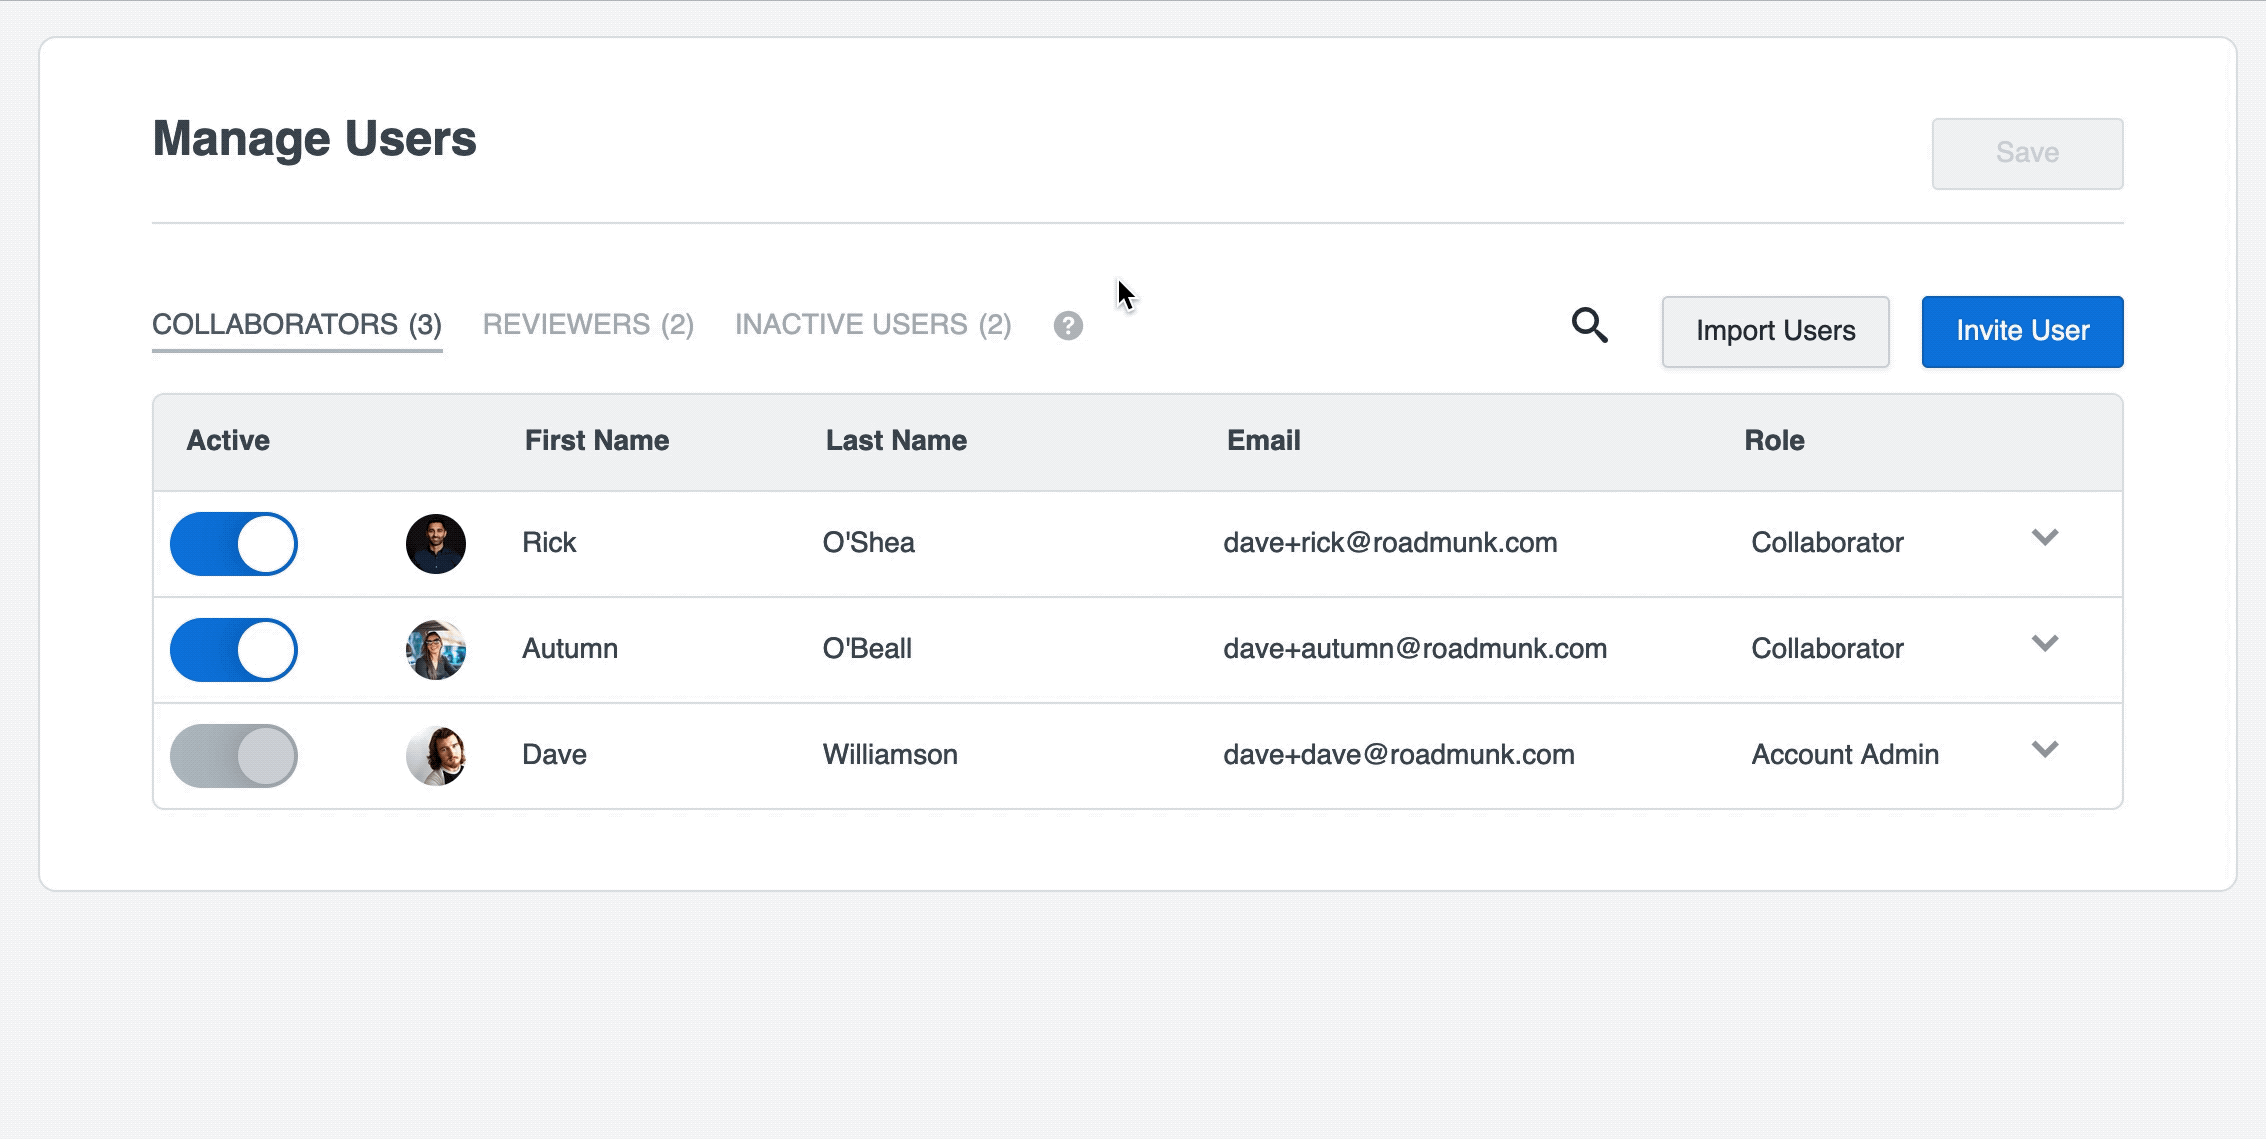
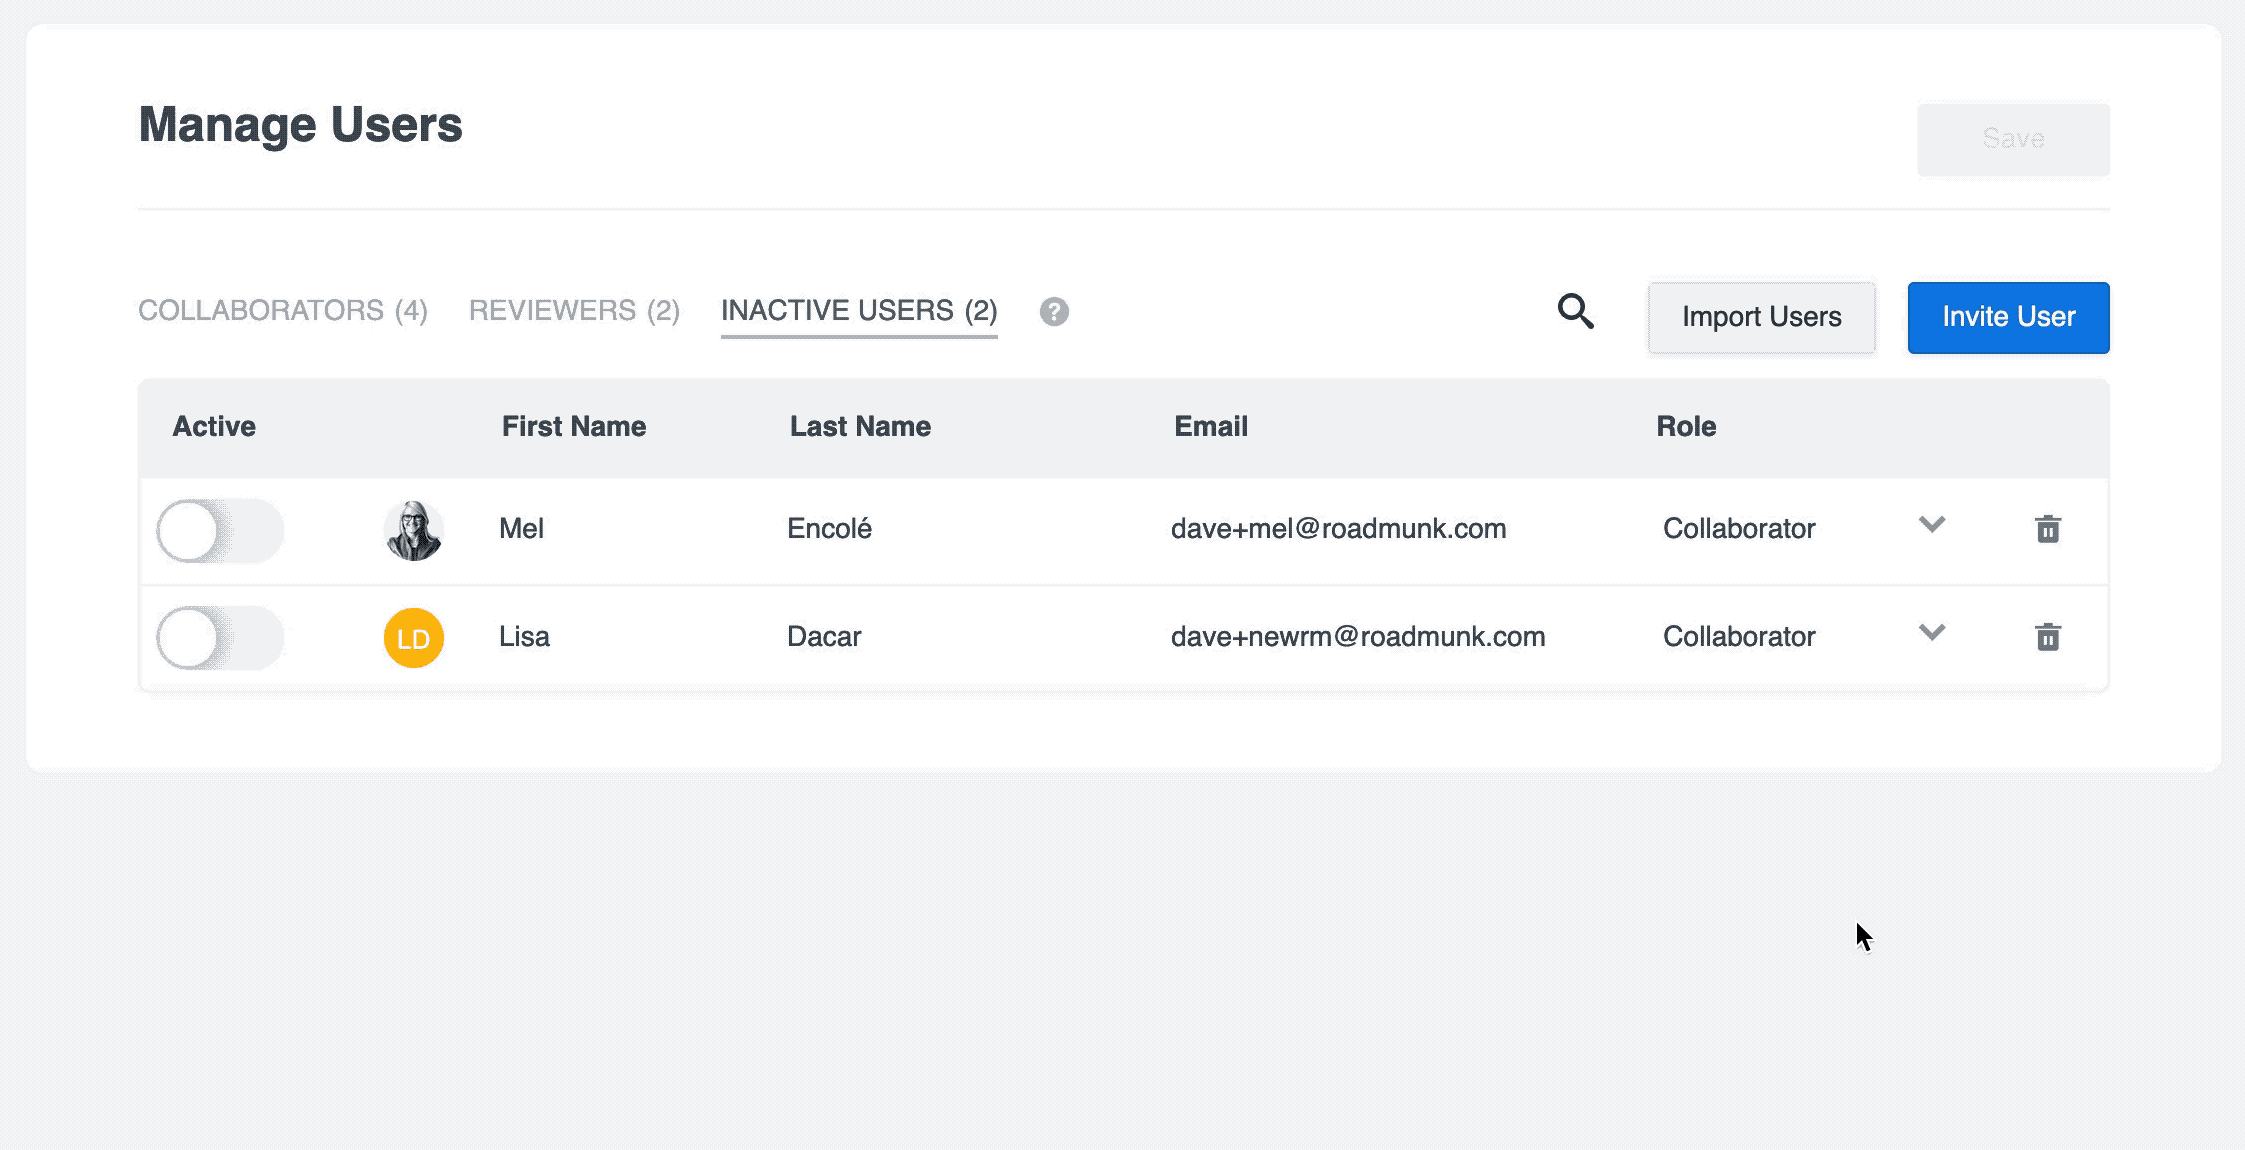
More details on the above user types are available in our article on user roles and permissions. As an Account Admin, you are able to add users through the Users tab in your Account Settings using one of two methods: manually or by importing them from a CSV file. The Users tab also includes additional lists of Collaborators, Reviewers and Inactive Users, which allows you to see the breakdown of roles and statuses for team members in your account.
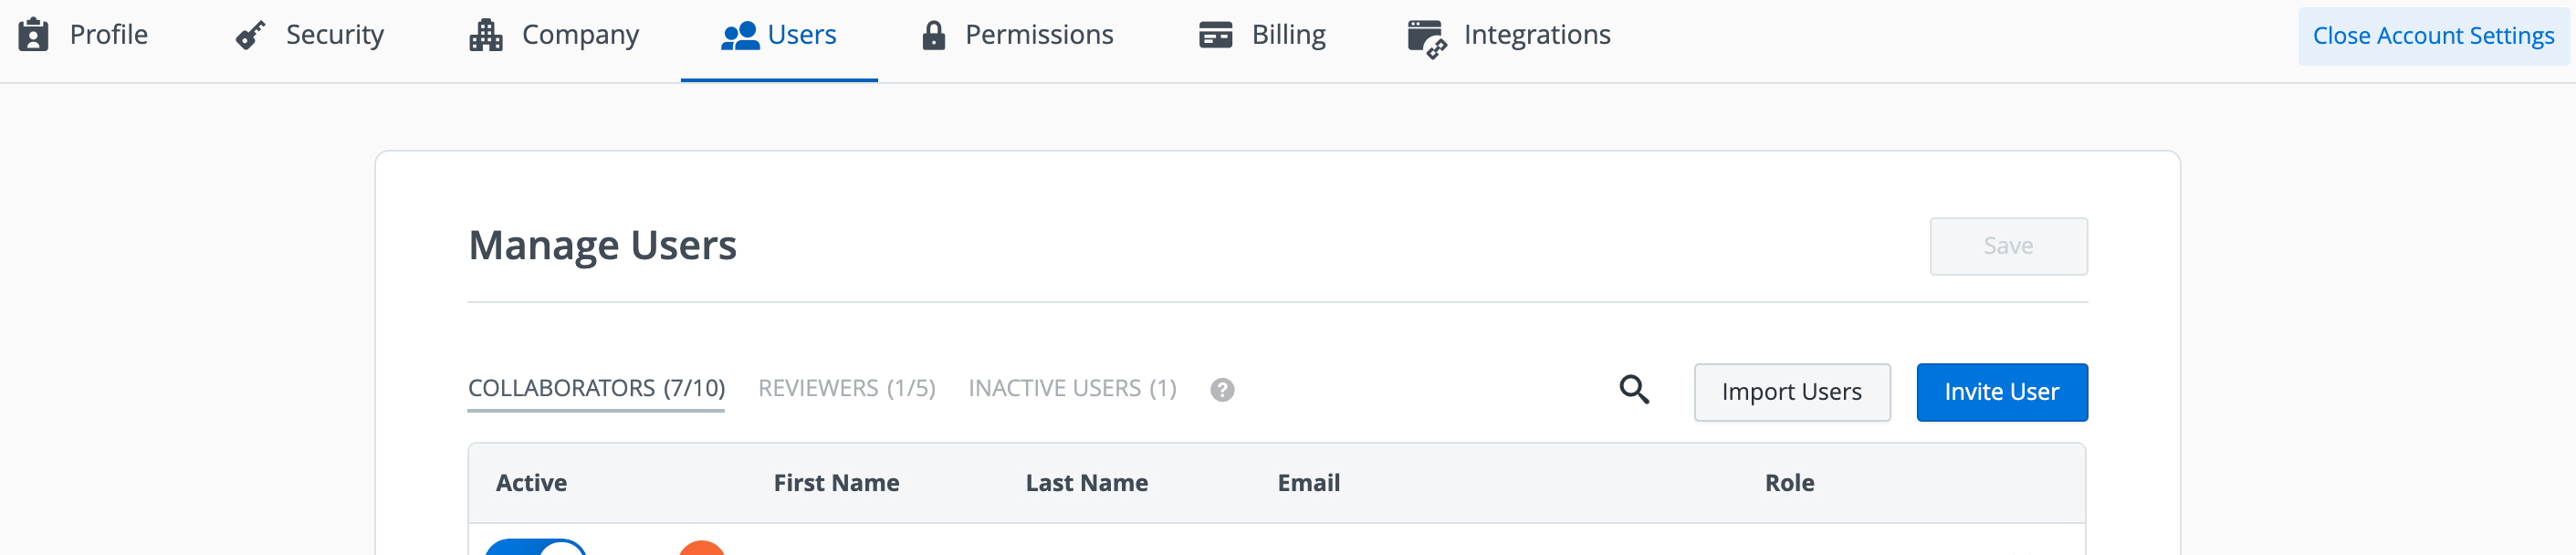
Sliding the activity toggle from Active (blue) to Inactive (gray) beside a user's name will automatically place them in the Inactive Users tab and the user will no longer be able to access the account. In order to re-activate a user, an Account Admin must head to the Inactive Users tab and toggle the desired user to an active state.
If you don't see the Users tab in the Account Settings menu, then you don't have the appropriate Account Admin permissions. To perform admin tasks you must log in using an account that has an Account Admin user role (see our article on managing user roles and permissions).
Adding a User Manually
In order to add a single user to your team's account:
Navigate to the Users panel on the Account Settings dashboard
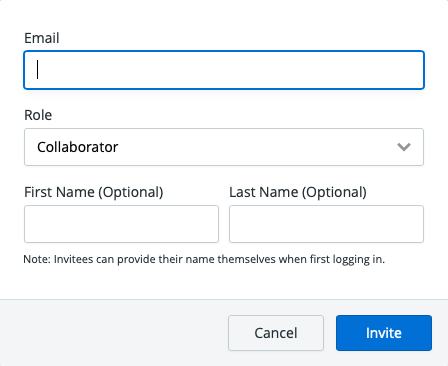
Click the Invite User button in the top-right corner
In the modal that appears, please enter the following details:
Email - The user's email address. Roadmunk uses this to send the invitation and will be the email they login with when accessing the application.
Role - This will be the type of license and permission level allocated to the invited user. More details on these roles can be found in our article on managing user roles and permissions.
First & Last Name - The name of the user being invited to Roadmunk. Please note that this is optional since invited users can provide their names themselves when setting up their profile after first logging in.
Once the details have been added, you can click on the Invite button on the modal to deliver an invitation to the user via email.
Once this process is completed, you’ll be able to see that user listed under the appropriate list in your Users tab and the user will receive a verification email from noreply@roadmunk.com titled “Your teammate has invited you to Roadmunk” within 1-3 minutes of this change being initiated. Their setup & verification link can be found inside the email.
Import Users from CSV
In addition to adding users to the account manually, Account Admins can also invite multiple users in a single action by importing them from a CSV file.
To run a CSV import of users:
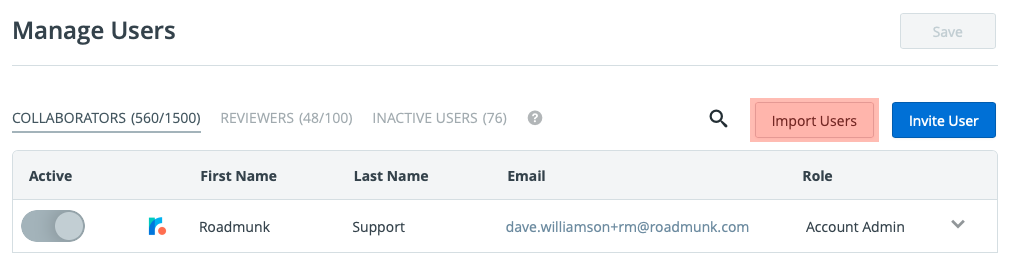
In the Users tab, click the Import Users button highlighted above.
In the Import Users modal that appears, click Download Template to Begin.
Open and populate the template with your user data, then save it as a CSV file.
When ready, drag and drop the file into the modal or click to browse and select the file.
The modal will display a summary of how many users will be imported, listed by user role.
Click the Import Users button to finish the import.
Once this process is completed, you’ll be able to see the imported users listed under the appropriate lists in your Users tab and the users will receive a verification email from noreply@roadmunk.com titled “Your teammate has invited you to Roadmunk” within 1-3 minutes of this change being initiated. Their setup & verification link can be found inside the email.
You can also use the CSV import to update details of existing users instead of making the changes manually, with any updated users being listed in the import summary under the Updates section.
When importing a CSV, special characters in the CSV file may not be readable by the application depending on the format it was saved in. This means that any records with extra spaces, extended string length, or other types of unrecognized formatting may generate an error prompting you to review the data.
Update a Team Member's Email Address
As an Account Admin, you will have the ability to update your teammates’ email addresses as needed from the Users tab in your Account Settings menu. In order to update the email address:
Click into your avatar in the bottom-left corner, navigate to the Account Settings menu
In the menu, select the Users tab to view your active team members
From your user's list, locate the user you would like to update (either in the list or using the search option)
Click into the user email(s) you would like to change and enter the updated email address.
Press the Save button in the top-right corner to persist the changes
Once this process is completed, you’ll receive a confirmation of the email(s) being updated and the user will receive an email from noreply@roadmunk.com titled “Verification of Email Change” within 1-3 minutes of this change being initiated. The user's email address will not be updated on the system until they've clicked into the update link found inside the dispatched verification email.
Note: You will be able to see a small alert badge beside the user’s name to show that there’s a pending email change for that user profile, which will persist until the user has verified the email change from their new address. You can also view which email the profile has been updated to by hovering over the badge.
Delete Users from Your Roadmunk Account
Deleting a user is a permanent action and user profiles cannot be restored once deleted. Please refer to the below checklist and proceed with caution when using this administrator function.
Before Deleting a User
Roadmap Ownership: Does this user own any roadmaps? Note that if a user that owns roadmaps got deleted, all of their roadmaps will change into "no-owner", and only Account Admin can have access to those roadmaps through the All Roadmaps folder
Integrated Roadmap Ownership: Does this user own any roadmap that is integrated into JIRA or ADO? Make sure to re-assign ownership before the deletion.
Product Area Ownership: Does this user own any Product Areas? A Product Area is mandatory to have at least one owner. If this user owns any Product Areas, make sure to re-assign ownership first!
Steps to Delete a User:
As an Account Admin, you will also have the ability to delete your teammates’ inactive profiles once they’re no longer a part of the organization or team. This can be done from the Inactive Users list, found in the Users tab in your Account Settings menu. In order to delete a user from Roadmunk:
Click into your avatar in the bottom-left corner, navigate to the Account Settings menu
In the menu, select the Users tab to view your active team members
Click into the Inactive Users list option to view all users who have been deactivated
From your Inactive Users list, locate the user you would like to update (either in the list or using the search option)
Once you’ve located the user, select the Remove icon (🗑) found on the far-right side of the user list.
You’ll receive a confirmation popup to confirm that you would like to remove this user.
Once you click Delete in that modal, the user will be removed entirely and their roadmaps will be unassigned.
The user will receive no notification of this change and any comments made by or comment mentions of that user will be changed to show that they've been deleted. All roadmaps owned by this user will be retained in the account and can be managed by an Account Administrator and viewed from the All Roadmaps list on your Roadmaps homepage. Should the user be invited back into Roadmunk under the same email address, roadmaps will need to be manually re-assigned to that user.
Add & Manage Users with SSO Enabled
At the current moment, JIT (Just-In-Time) Provisioning is not supported. New users will need to be invited and assigned to the application in both Roadmunk and your Identity Provider. To accomplish this, here are the steps to follow.
In the Identity Provider Platform
As the SSO Admin:
Log in to your SSO Homepage Admin Console (if applicable) to add users to your IdP (Identity Provider).
Note: When inviting users, please note that Roadmunk uses email as the UPN (User Principal Name/Unique User Id).Once users are added the next step is to assign users to the proper group. To do this, first navigate to the Roadmunk Application on your IdP platform, and then head to the Assignment/Users & Group Assignment section.
Click "Assignment" or "Assign Users or Groups" to assign desired users or groups to your Roadmunk Application.
In the Roadmunk Application
As the Roadmunk Account Admin:
Once you receive confirmation that your users are assigned to the correct group in your IdP please follow the standard process and invite the users to your Roadmunk account.
As a newly invited user
Once your team has invited you to Roadmunk, you will receive an invitation email to join your team:
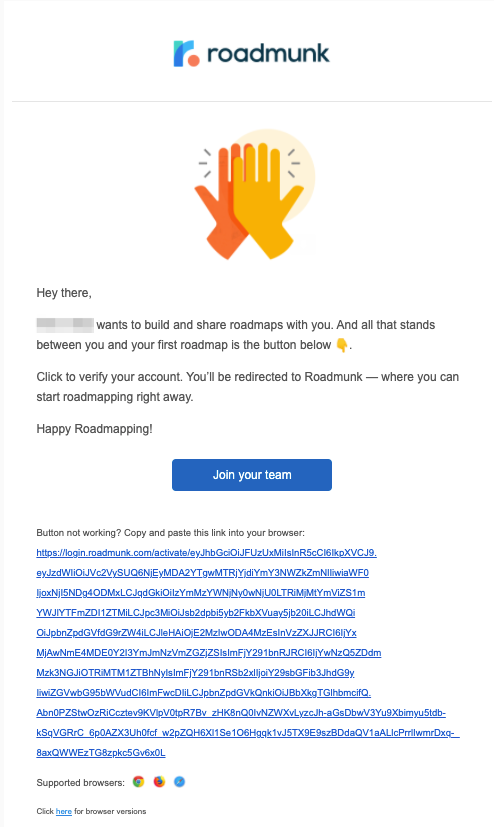
Navigate to your inbox and find the invite email - “Your teammate has invited you to Roadmunk”, it should look like the image above.
Click the Join your team button.
On the next screen, click Login with SSO, and provide your SAML credentials.
Proceed through the remaining account creation steps.
Once completed, head to Account Settings > Security, and you should see SSO as your only authentication method.
As an existing user
As an existing user on the account, sometimes you may find that SSO authentication is enabled after you've already had access to the account. Once SSO is set up, the Account Admin can choose to enforce SSO as the only login method moving forward, or alternatively leave it as a login option that you can select if desired.
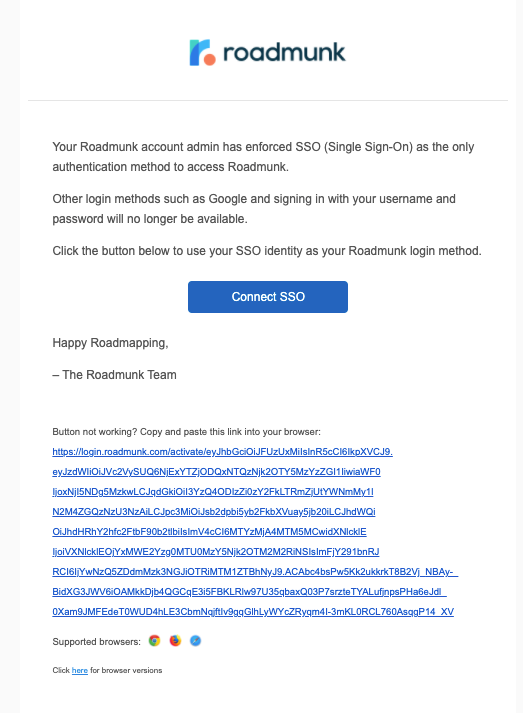
SSO enforced - If your team has enforced SSO as the only authentication method, you will receive an email titled ‘ACTION REQUIRED: SSO Enabled on your Account“ (Please reference the image below). Please click “Connect SSO” to complete the SSO verification and setup process.
SSO not enforced - If you'd like to add SSO as a login method, simply head to Account Settings > Security tab, and click +Login Methods." You can follow the detailed instructions in this article.
Please Note: To add SSO as an authentication, a Role assignment on the IdP provider side is required. Please check with your Account Admin before adding SSO as one of your authentication methods.