You can use our comprehensive step-by-step guide to configure database you need.
-
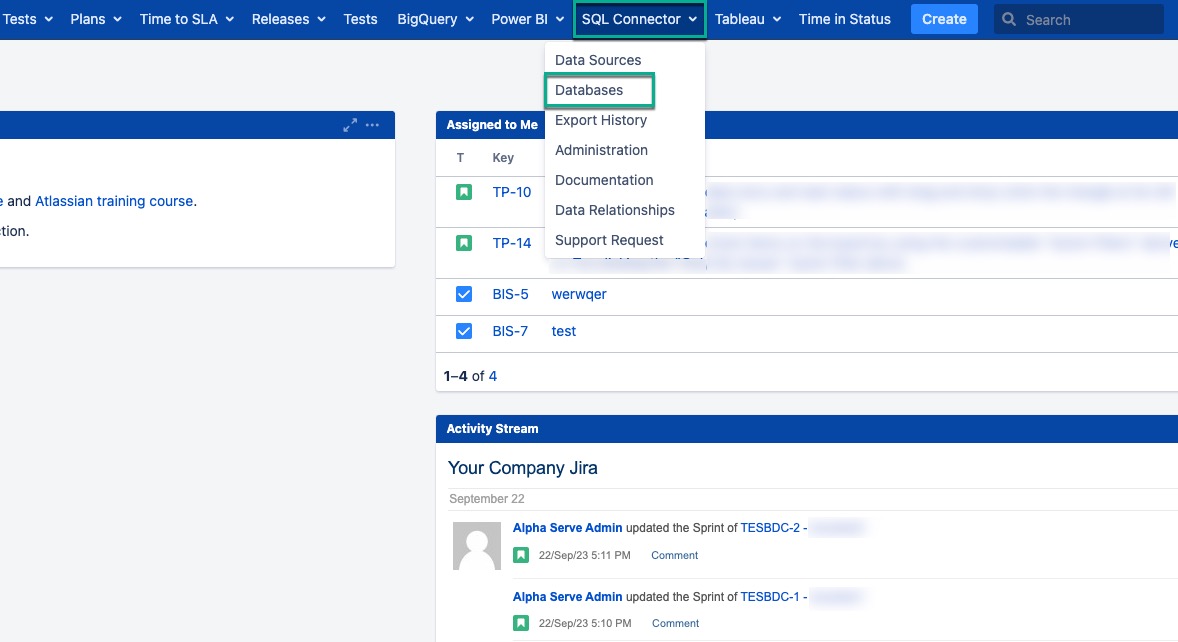
Being signed in to your Jira instance, select SQL Connector, and then select Databases.
-
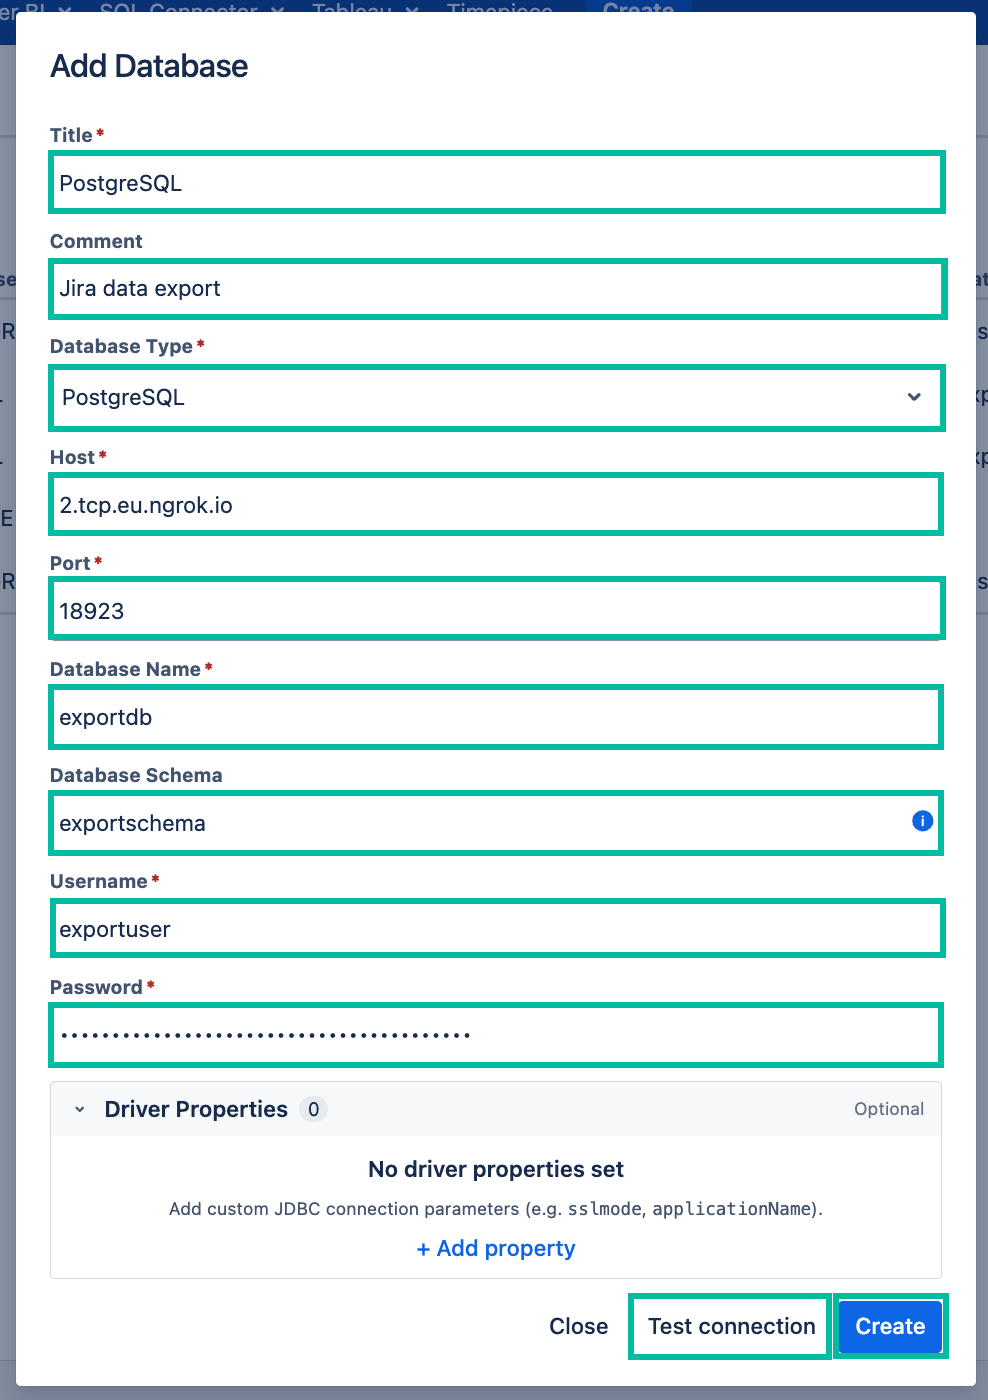
Select Add Database.

-
In the Title* section, enter the title for your database.
-
[Optional] In the Comment field, enter any useful information.
-
In the Database Type* field, select the type of your database.
-
In the Host* field, enter the host of your database.
-
In the Port* field, enter the host of your database.
-
In the Database Name*, enter the name of your database.
-
[Optional] In the Database Schema*, enter the data schema.
By leave the Database Schema* field empty, the default data schema will be applied.
-
In the Username* field, enter your username.
-
In the Password* field, enter your password.
-
Select Test connection to check if everything is correct, and then select Create.
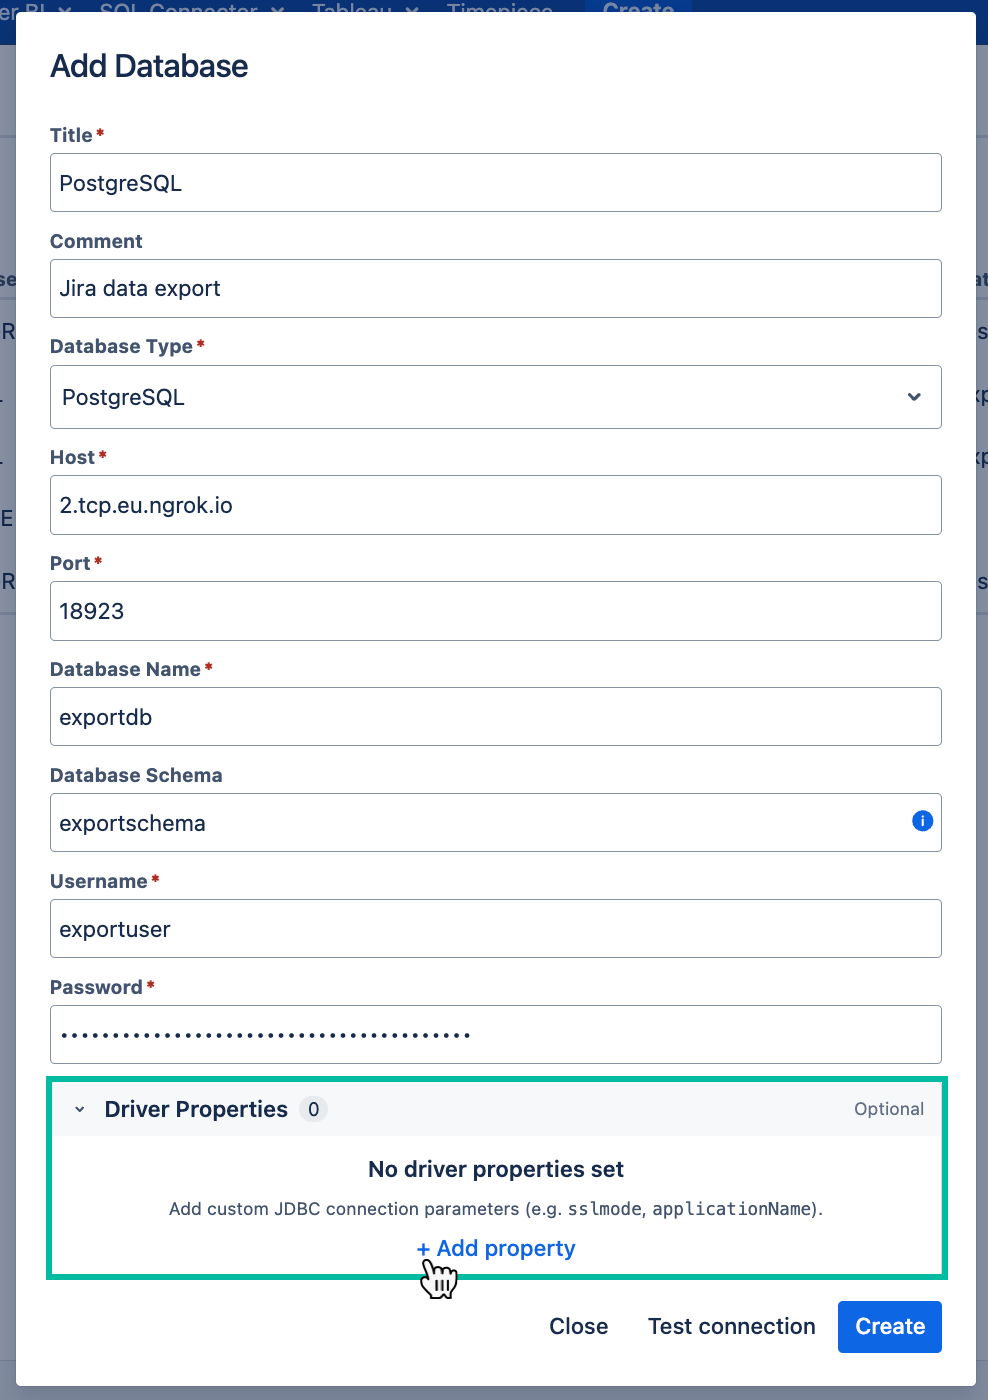
Driver Properties
Driver properties allow you to pass additional JDBC parameters (e.g., SSL settings, connection timeouts, etc.) directly to the database driver. This is useful when the standard connection fields don't cover your specific configuration needs.
Add custom JDBC driver properties as key/value pairs by selecting Add Property, entering the property name and value, and repeating as needed.
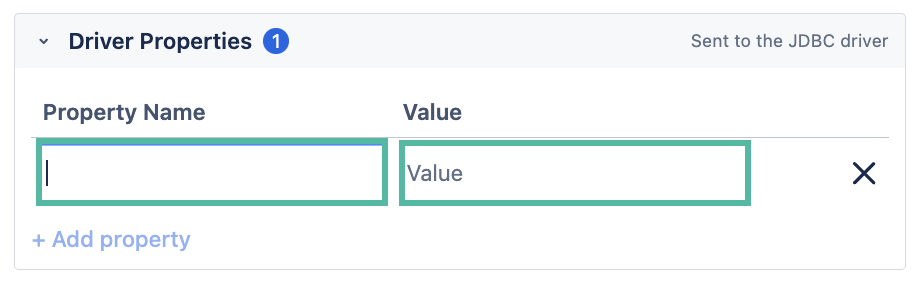
The reserved keys user and password cannot be used as driver properties. Duplicate or blank keys will trigger a validation warning, and the Test Connection / Create buttons will be disabled until resolved.