Viewing Feedback
View Feedback in the Feedback Inbox
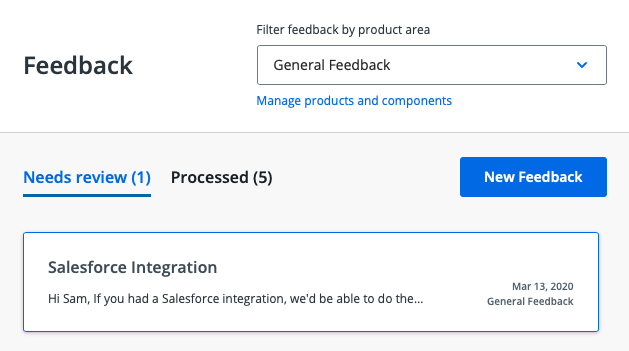
In the Feedback module, incoming and processed feedback can be viewed through the Feedback Inbox - the default landing screen when you click the Feedback icon in the navigation bar. In this inbox, users are able to view and process Feedback directed towards their Organization, Products, or Components by your Customers & Contacts.
View Idea-Specific Feedback in the Idea Card
Once it has been processed and attached to an Idea, users are also able to view the feedback associated with specific ideas through the Idea Card. To locate idea-specific Feedback, navigate to the Ideas module through the navigation bar and navigate through the Idea View to the idea you're looking to view feedback on.
In the Attached Feedback panel on the right-hand side, users can view all attached feedback and filter to show any important feedback by clicking the checkbox labeled "Show Important Feedback Only". Users can also quickly view the Feedback Details by clicking into the feedback from the provided list.
View Feedback contributed by a Customer or Contact
To locate customer-specific Feedback, navigate to the Customers module through the navigation bar. Inside the Customers module:
-
Locate the customer using either the Customer List or Search options
-
Click into the customer's profile, opening the Customer Details panel on the right-hand side
-
Switch to the Feedback tab located under the customer's name
In this tab, you will find a list of all pieces of Feedback which the customer has submitted and can easily view the Feedback Details by clicking into the feedback from the provided list.
New Contacts created via the Feedback Portal will not auto-populate a unique Customer name if they haven't previously been added to your Customers list. In these cases, we will populate their email in the place of their Customer name - this can be easily updated by following the steps provided in this article.
Submitting Feedback
Submitting Feedback On-App
To submit feedback from the Feedback module in Strategic Roadmaps:
-
Navigate to the Feedback Inbox in the Feedback module.
-
Click on the New Feedback button in the top-right corner of the inbox panel.
-
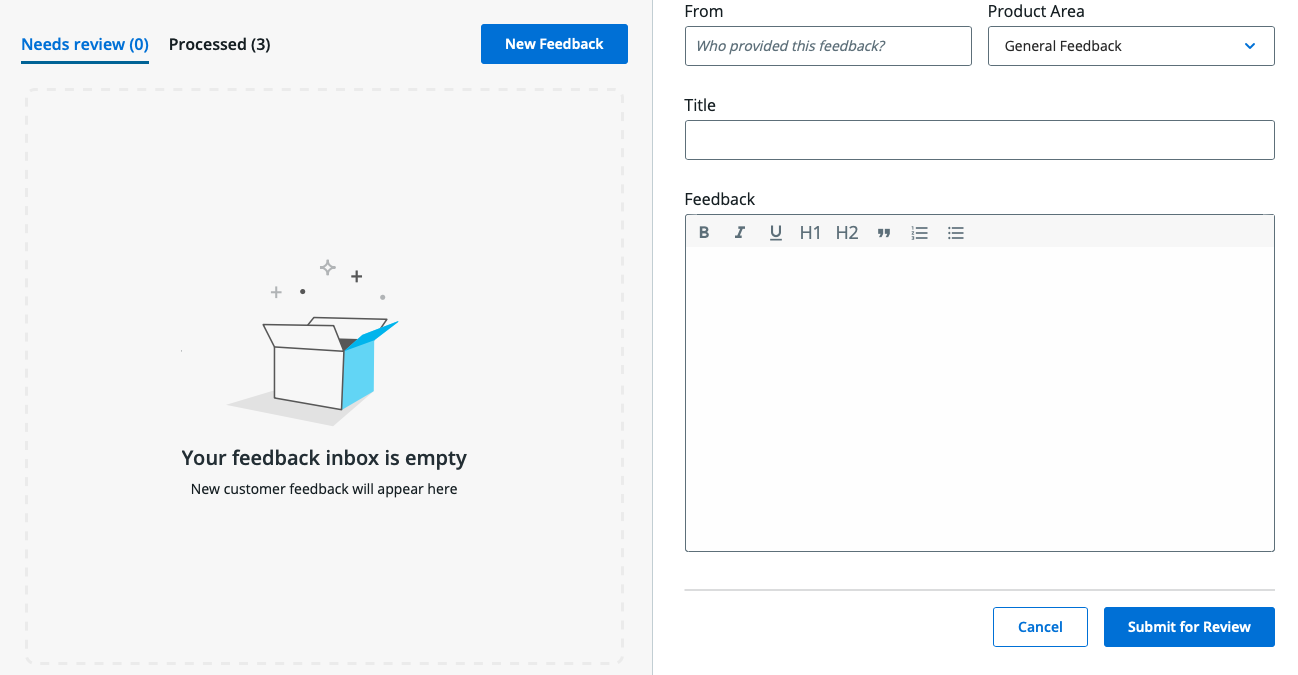
In the Enter New Feedback panel, please enter the following:
-
Enter the Team Member, Customer, or Contact who contributed the feedback in the From field. The Current User will be auto-populated in this field.
-
Use the Product Area dropdown to select the associated Product or Component
-
In the Title field, enter an easy-to-understand title that summarizes the feedback
-
In the Feedback text area, you can enter the message content or provide a detailed explanation of the feedback that was provided
-
-
Once this has been completed, click the Submit for Review button in the bottom-right corner.
Submitting Feedback through the Feedback Portal
To submit feedback through a Feedback Portal:
-
Navigate to the Feedback Portal URL you're looking to submit feedback through.
-
Populate the required details in the fields visible on the Portal.
-
Click Submit Feedback to send it into your team's Feedback inbox.
Submitting Feedback using the GraphQL API
For more details on the functionality of the Strategic Roadmaps API, please view our API Documentation.
Managing Feedback
Processing Feedback in Strategic Roadmaps
When Feedback arrives in Strategic Roadmaps, it is automatically assigned to the Needs Review inbox for the appropriate Product or Component that it's filed under. If you're an owner of that Product or Component, you will also be able to see this under the My Products product area. To process submitted Feedback:
-
Navigate to the Feedback Inbox in the Feedback module
-
Locate the feedback in the Needs Review inbox
-
Click into the feedback to open the Feedback Detail panel
-
Confirm that the feedback is directed to the correct Product Area
-
Attach the feedback to any relevant Ideas under Attached Ideas
-
For higher-insight or higher-value feedback, you can tag it as Important Feedback using the checkbox at the bottom of the panel
-
If there are any notes required before processing, you can leave those in the Comments section and tag any team members who may need to provide their input on the feedback
-
Once the feedback is ready to be processed, click the Mark as Processed button in the bottom-right corner of the Feedback Detail panel.
Processed feedback will be immediately moved from the Needs Review inbox to the Processed inbox.
Editing Feedback in Strategic Roadmaps
As with any type of submission, Feedback submissions can be prone to errors and accidents too - because of this, we allow Collaborators and Admins edit feedback within Product Areas they own quickly and easily in the Feedback Inbox. To make this adjustment:
-
Navigate to the Feedback Inbox in the Feedback module
-
Locate the feedback you're looking to edit in either the Needs Review or Processed inbox
-
Click into the feedback to open the Feedback Detail panel
-
Click into the ellipsis menu in the top-right and select Edit Feedback from the drop-down
-
In the screen that appears, make your updates as needed and click Save Changes when done
Once completed, you'll see a notification in the bottom-left corner letting you know that the feedback has been updated and you'll be able to view the Last Updated date and editor at the top of the submitted feedback in your Feedback Detail panel.
Redirecting Feedback in Strategic Roadmaps
Sometimes Feedback will be submitted to the incorrect product or component or needs to be quickly reassigned to the correct location after being processed - because of this, users are able to redirect feedback to the correct owner/team quickly and easily in the application. To make this adjustment:
-
Navigate to the Feedback Inbox in the Feedback module
-
Locate the incorrectly assigned feedback in either the Needs Review or Processed inbox
-
Click into the feedback to open the Feedback Detail panel
-
Select the appropriate Product Area from the drop-down at the top of the panel
-
A redirect warning will appear once this action is taken - click Redirect to confirm
Once the user has clicked Redirect, the feedback is moved into the appropriate inbox for the selected product or component. There is no limit to the number of times that feedback can be reassigned, so if the feedback is still incorrectly assigned after being redirected this can be quickly remedied by following the steps above.
Deleting Feedback in Strategic Roadmaps
Sometimes accidents happen and things get submitted that shouldn't be. To help reduce clutter, duplicates, or erroneous data in the Feedback Inbox, we allow Collaborators and Admins delete feedback within Product Areas they own. To remove submitted feedback:
-
Navigate to the Feedback Inbox in the Feedback module
-
Locate the feedback you're looking to edit in either the Needs Review or Processed inbox
-
Click into the feedback to open the Feedback Detail panel
-
Click into the ellipsis menu in the top-right and select Delete Feedback from the drop-down
-
In the confirmation modal that appears, select Delete Feedback to remove this feedback
Please note that this action is permanent and cannot be undone, so please confirm that you are deleting the correct feedback prior to committing this change. Once completed, you'll see a notification in the bottom-left corner letting you know that the feedback has been removed and you'll be redirected to the next piece of feedback in the inbox queue.