Step 4 - Work with Items in the Items Table
In this section, we showcase some features of the Items Table that make it easy for you to browse and edit roadmap data, including hiding and showing fields, sorting and ranking items, bulk editing and deleting items, moving items to another roadmap, and viewing and editing items in the item card.
Hide and show fields
The hide/show field feature in the Items Table minimizes the need to scroll horizontally to view your roadmap's data.
Hiding a field
Mouse over the field you want to hide until the Hide Field (-) icon appears, then mouse over the icon and click it when it turns blue.
Showing a hidden field
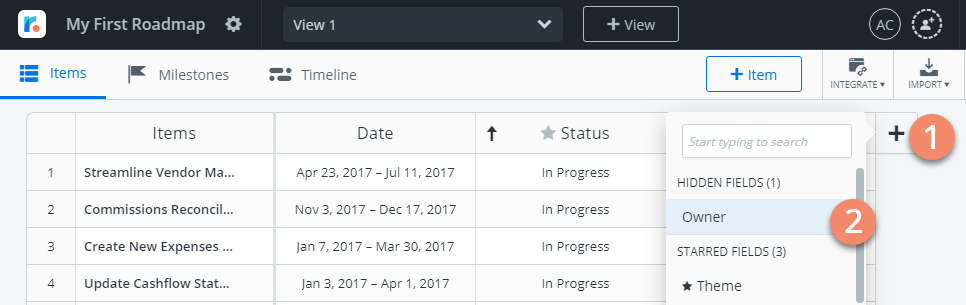
Click the Add Field (+) icon that's at the end of the table header.
In the dropdown's Hidden Fields list, click the field you want to show.
Remove fields
Just like you can add fields to a roadmap, you can remove them.
NOTE: Removing a field from a roadmap does NOT delete the field from the Strategic Roadmaps account. The field still exists but is no longer being used in the roadmap.
Mouse over the field you want to remove until the Cogwheel icon appears, then mouse over the icon and click it when it turns blue.
At the bottom of the dropdown, click X Remove From Roadmap.
Sort items
By default, Items in the Items Table are ranked in the order they were added (first item at the top). The Item Table's sort feature lets you sort items in alphabetical order by any field in the table.
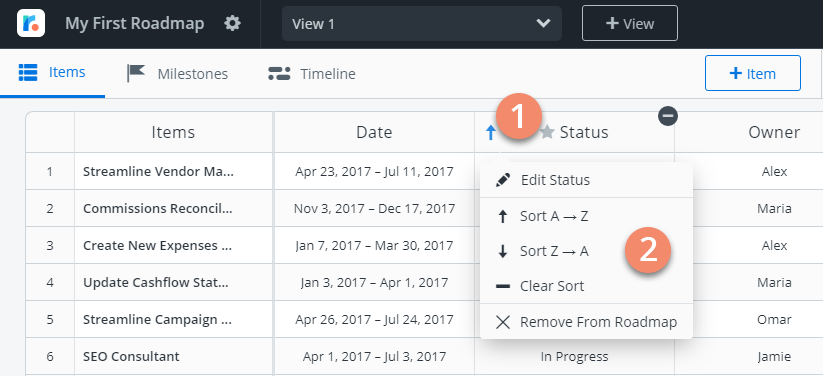
Sorting items
Mouse over the field you want to sort by until the Cogwheel icon appears, then mouse over the icon and click it when it turns blue.
In the dropdown, select Sort A to Z for ascending order or Sort A to Z for descending order.
You'll know which field items are sorted by and in what order by the up or down arrow next to the field's name.
Toggling ascending/descending and resetting the sort order
You can click the arrow icon next to the field and from the drop down select between between ascending and descending alphabetical order.
To reset the sort order, click the arrow icon next to the field and from the drop down select Clear Sort.
Rank items
As you saw, the default ranking of items in the Items Table is the order they were added. The ranking feature lets you change the order by moving items around on the table so they're ranked in a way that's more logical for you (for example, by level of importance or complexity).
To change an item's rank in the table, click the item's Item Ranking column and drag-and-drop the item in its new location.
IMPORTANT: Unlike with sorting, there's no way to automatically return items back to their original sort order. Once you change an item's place in the table, it stays there until you move it again. You can drag-and-drop more than one item at a time.
Bulk edit items
Let's say you want to change the Status of several items in the Items Table from Proposed to Backlog. Instead of making the change one item at a time, you can do a bulk edit.
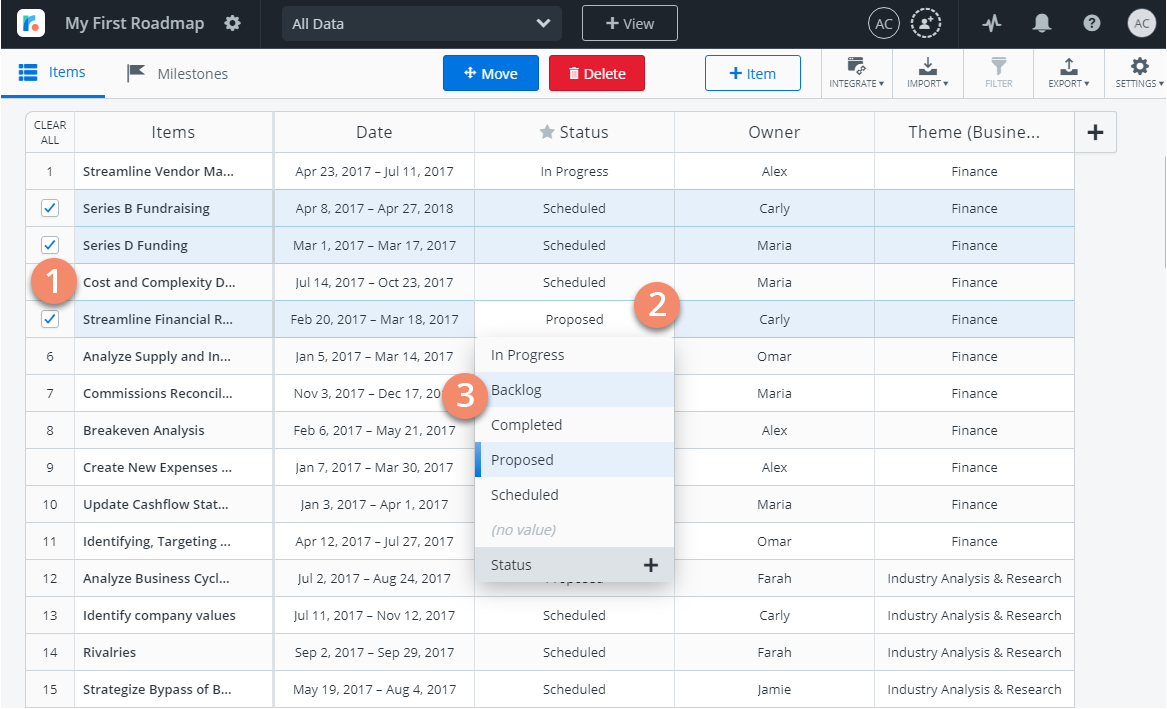
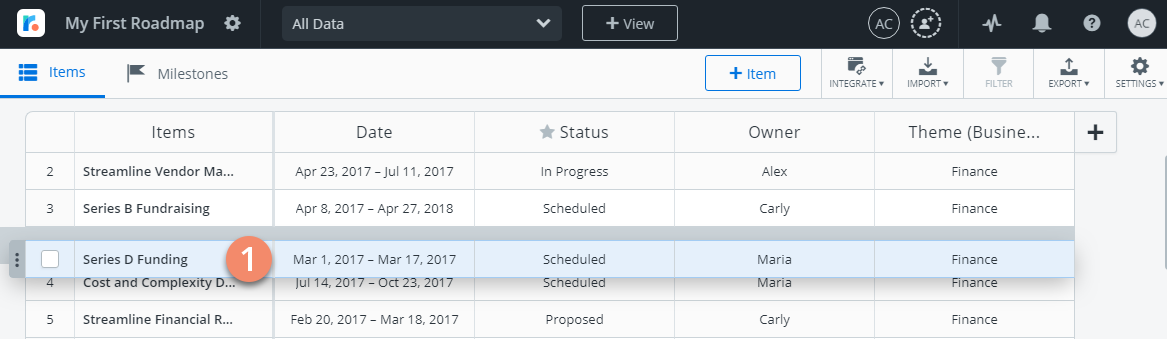
Select the items you want to edit in the table's first column. A checkmark in the column shows which items are selected. To unselect any item, click its checkmark. To unselect all items, click Clear All at the top of the column.
Click the field you want to edit in any of the selected items (Status).
In the dropdown, select the new value (Backlog). The existing value (Proposed) has a blue mark next to it.
Bulk delete items
The same way you can bulk edit items, you can bulk delete them.
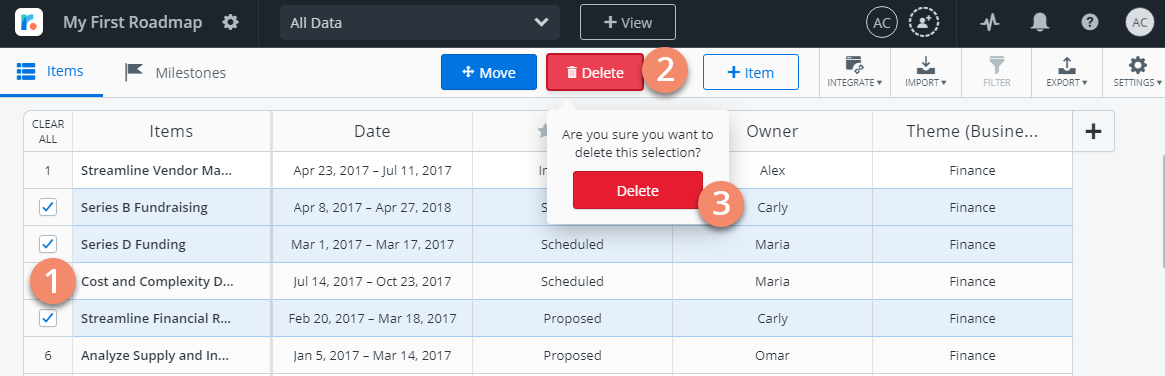
Select the items in the table you want to delete.
Click the Delete button that appears above the table.
Click the Delete button in the dropdown to confirm the deletion.
Deleting items from a roadmap deletes them from the Strategic Roadmaps account. You can't undo an item delete and, once you delete an item, it's gone forever.
Move items to another roadmap
The Items Table move feature lets you move items from one roadmap to another. You can move items to an existing roadmap or you can create a new roadmap for the items.
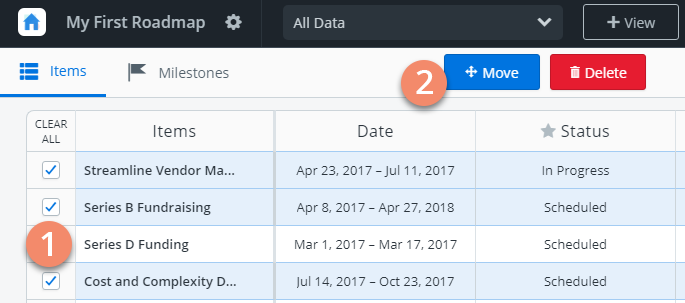
Select the items in the table you want to move.
Click the Move button that appears above the table.
In the Move Items dialog, select the roadmap in the Select a Roadmap dropdown OR click + Create New Roadmap, then click the Next button. NOTE: If you choose to create a new roadmap for the items, you'll go through the additional step of entering a roadmap Name and Fiscal Year-End, then go through Step 3 again to select the new roadmap.
Check the confirmation message and click Move Items.
View and edit items in the item card
If you remember from an earlier article, the item card is like command central for items, where you can view and edit everything associated with an item.
To open the item card from the Items Table, click the item's name.
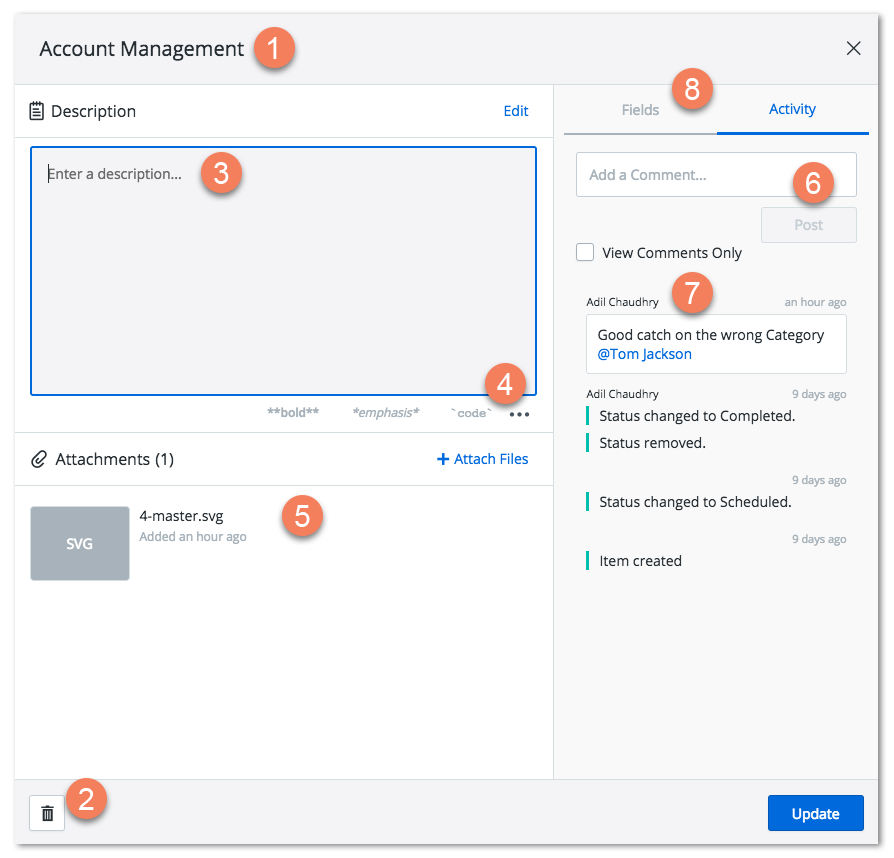
Edit the item's Name.
Delete the item. WARNING: The item will be permanently deleted from the Strategic Roadmaps account. You can't undo a delete.
Edit and format the item's Description using plain text or Markdown.
Get help on Markdown formatting.
Upload, view, download, and delete file attachments.
Post Comments. To add a Mention to a Comment, enter @ and start typing the person's name to select it from a dropdown. People you mention in a Comment get an email notification.
View item Activity, including edits and Comments. To hide edits, click Select View Comments only.
View and edit the item's Fields.
Next Step
Step 5 - Add Milestones to a Roadmap