Step 3 - Add and Create Fields
At this point in the tutorial you've learned how to create a roadmap from scratch and using a template as well as how to add items to a roadmap manually or by importing a CSV file. In this article, we look at how to add a field to a roadmap.
When adding a field to a roadmap, you can select a field that already exists in the Strategic Roadmaps account or you can create and add a new field.
Add an Existing Field to your roadmap
The simplest and easiest place to add a field is the Items Tables. For the tutorial, we're going back to the roadmap you created from scratch in Step 1. Create a new roadmap, and to which you added an item in Step 2. Create and import items.
Adding the Field to your Roadmap
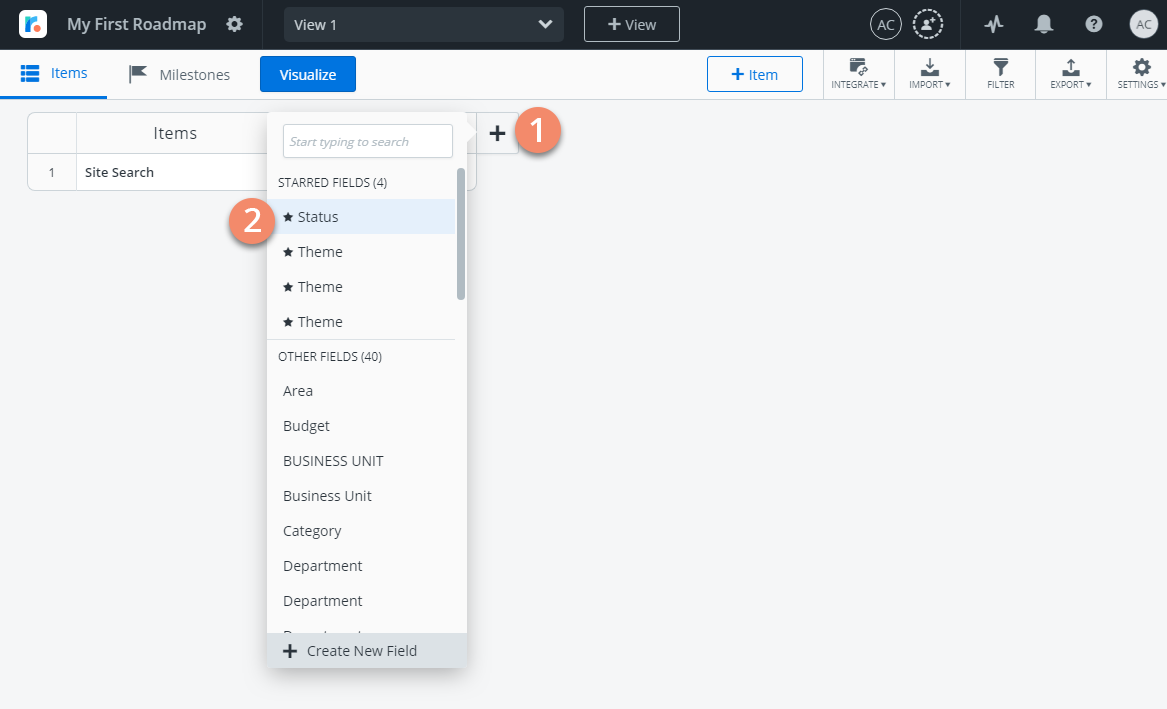
Click the Add Field (+) icon on the far right of the table header.
In the dropdown, start typing to search for the field or scroll down to find it, and then select it.
The field gets added to the roadmap's Items Table and you can now enter a value.
Selecting Field Values
Strategic Roadmaps has four types of fields: Free-Form Text, List, Multi-Select List and Numeric. To populate numeric or free-form text fields, you just type in the value. To populate list or multi-select list fields, you select values from a list. For the tutorial, we're adding Status, which is a list field.
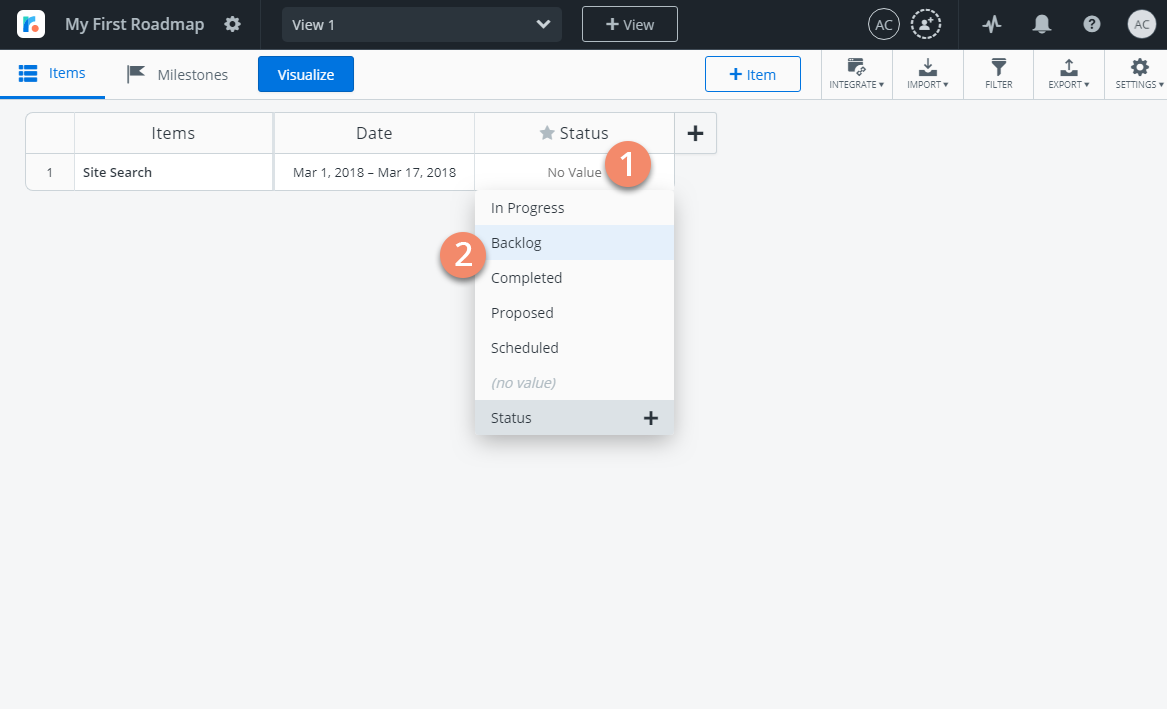
Click inside the item's new field to view the available values.
In the field value dropdown, start typing to search for the value or scroll down to find it, then select it. For the tutorial, we're selecting Planning.
Congratulations!
You've just added and populated your first roadmap field. Next we look at how to create a new field before adding it.
Create and add a new field
If you want to add a field to a roadmap and you don't see it in the Add Field dropdown (steps 1 and 2 above), it means the field does not exist in the Strategic Roadmaps account and needs to be created. One of the great things about Strategic Roadmaps is that you can create a new field right from the roadmap you want to add it to. Here's how.
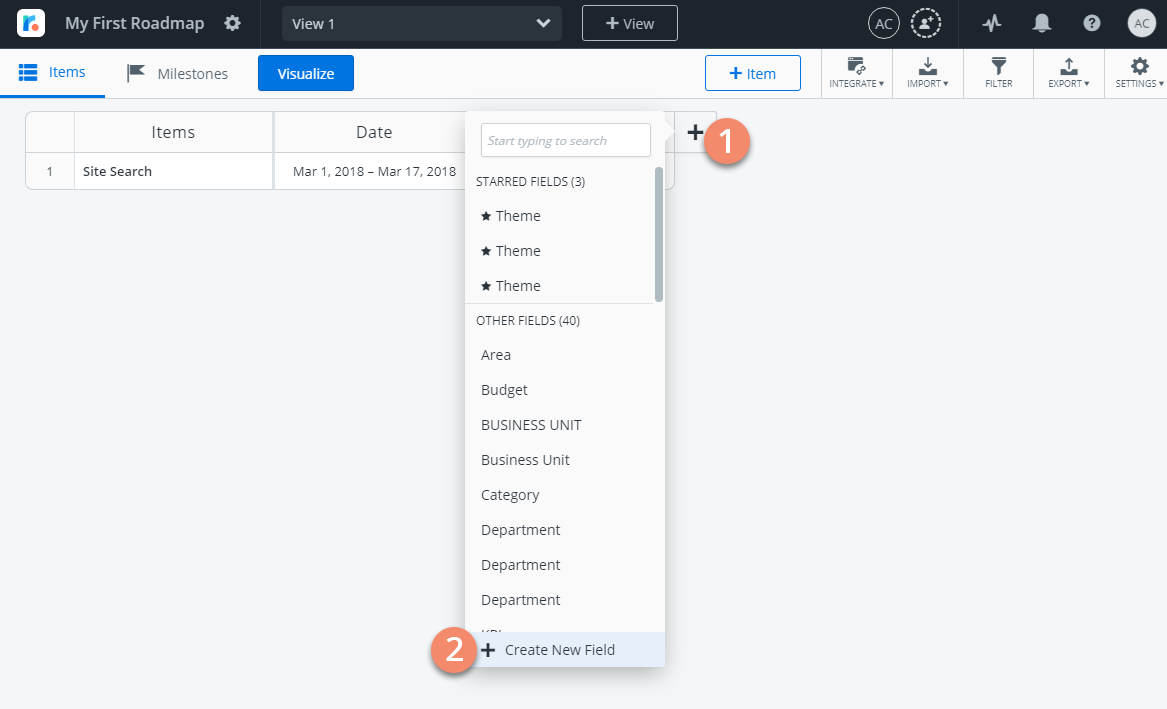
In the Items Table, click the Add Field (+) icon on the far right of the table header.
At the bottom of the dropdown, click + Create New Field to open the New Field dialog.
Inline Field Creation
The Items Table also has support for inline Field creation, letting you simply and quickly add Fields to you roadmap.
Navigate to the Items Table
Locate the Add Field plus sign
Start typing the Field you want to create
Click on the + New “Field Name” Field dropdown
Select the Field Type you want to create
NOTE: When choosing to create a List or Multi-Select list Field Type, a modal will appear allowing you to input field values.
Creating a Free-Form Text field
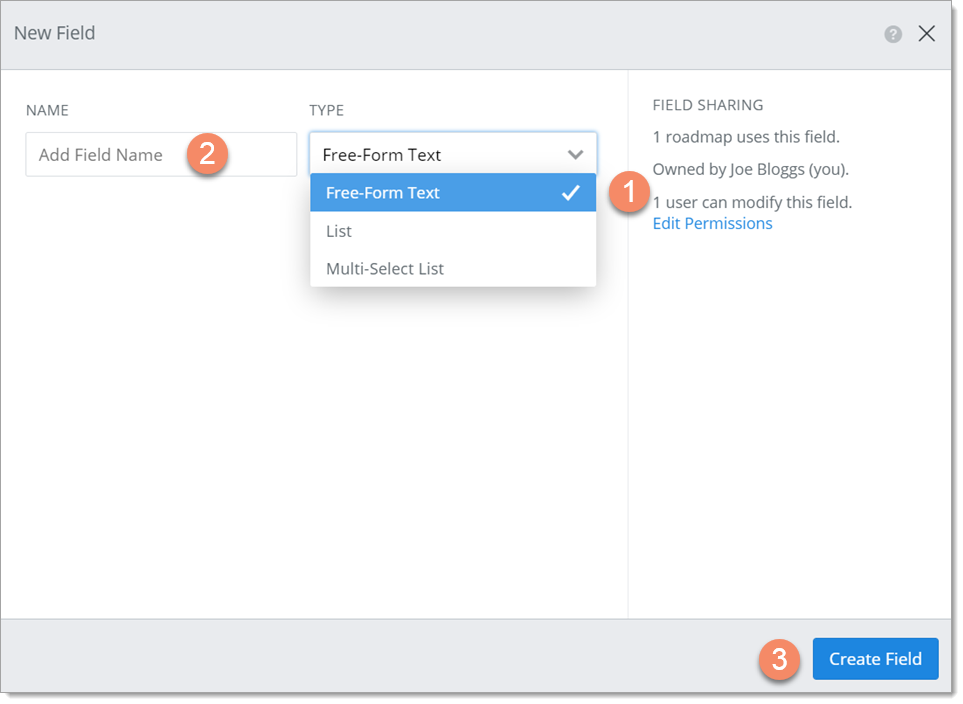
In the New Field dialog, select Free-Form Text in the Type dropdown.
Enter a Name for the field, e.g, Comments or Notes.
Click Create Field.
Creating a Numeric field
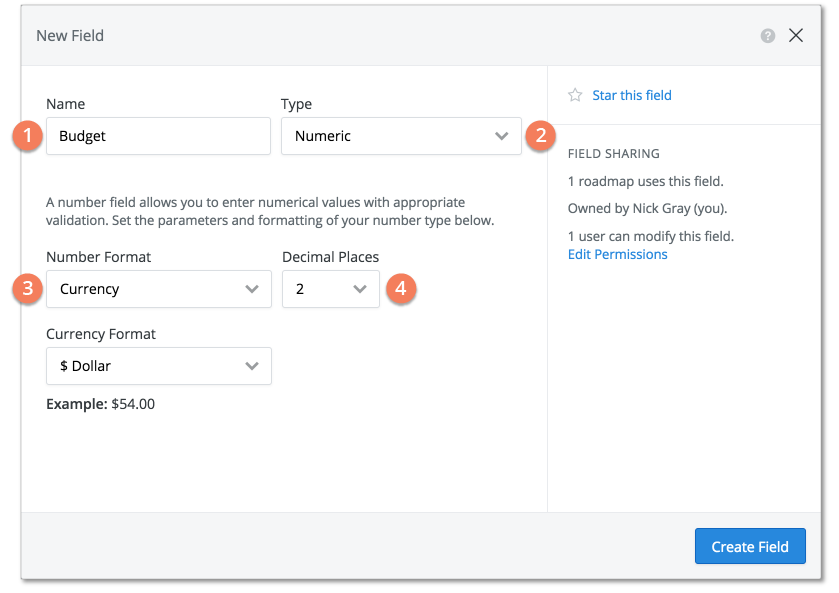
In the New Field dialog, select Numeric in the Type dropdown.
Enter a Name for the field, e.g, Status or MRR.
Select the desired Number Format for either Currency, General or Percentage.
Choose the number of decimal places.
Click Create Field.
NOTE: When choosing Currency as your Number Format, you can then select your Currency Format to be either Euro, Pound or Dollar.
Creating a List or Multi-Select List field
List and Multi-Select List fields are created the same way. The only difference is that more than one value can be selected for a Multi-Select List field.
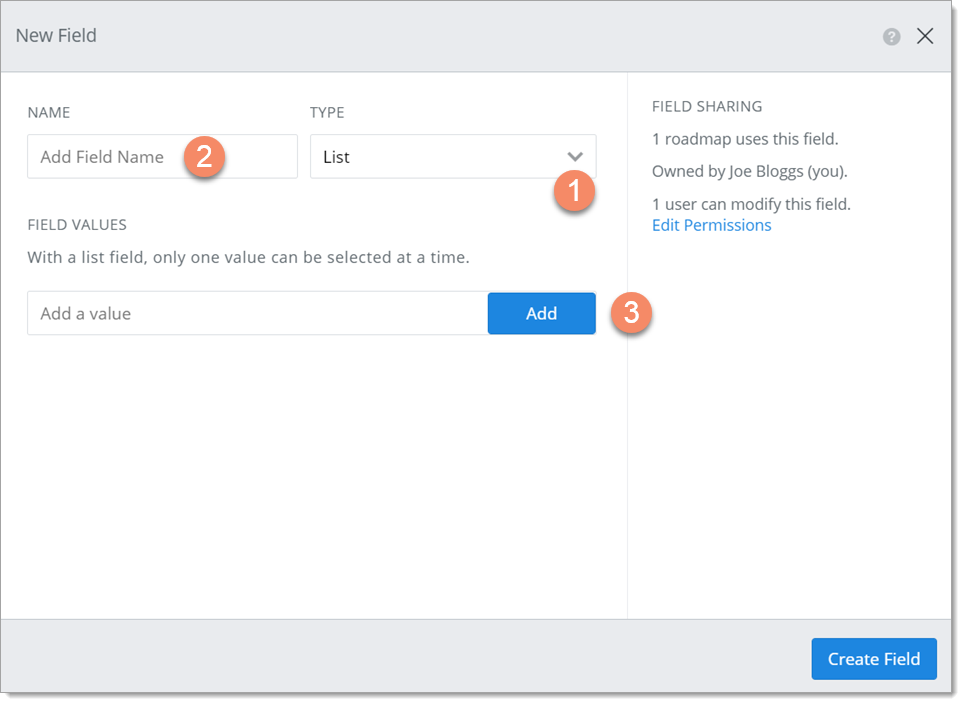
In the New Field dialog, select List or Multi-Select List in the Type dropdown.
Enter a Name for the field.
Enter the first value you want in the field's list and then click Add.
Keep adding values to the list in the same way.
To change the order of the values in the list, click and drag values to their new position.
To delete a value from the list, click the Delete icon.
When you're done adding and arranging values, click Create Field.
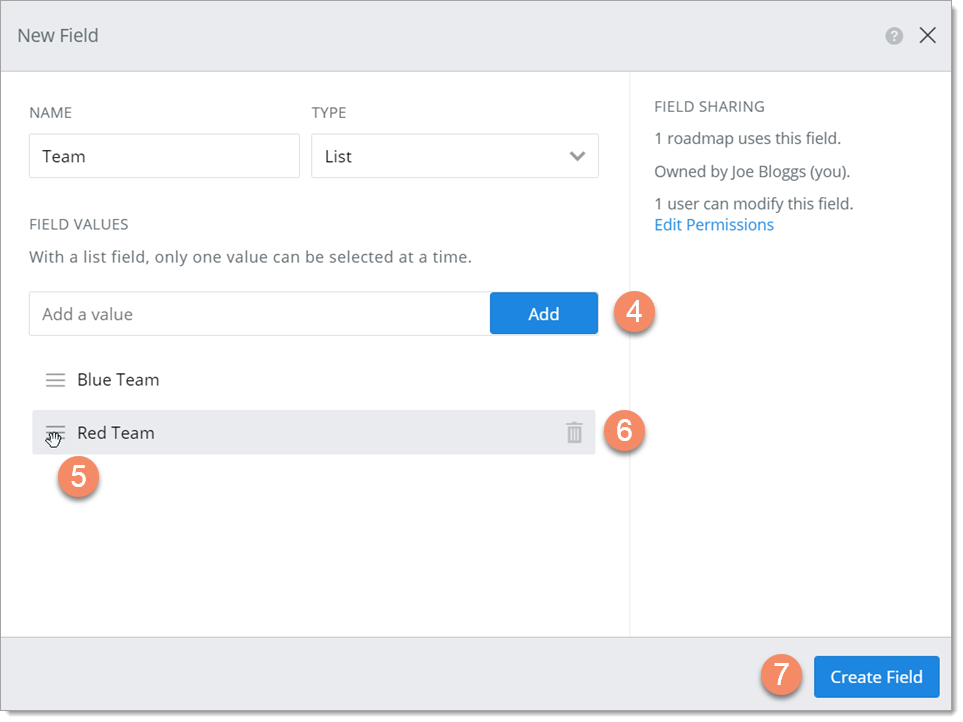
Don't worry about getting the list right the first time. You can come back and edit the list of values at any time.
What's next?
Congratulations! You've now gotten through the three most important steps in getting started with Strategic Roadmaps: 1. Creating the roadmap, 2. Adding a roadmap item, 3. Adding a field to a roadmap and creating a new field. Next, we'll look at some features of the Items Table that make it easy for you to browse and edit your roadmap items.
Next Step
Step 4 - Work with Items in the Items Table