Alternate Authentication Methods in Roadmunk
Google Sign-in
Available on all plans.
Roadmunk's support for Google Sign-in allows users to sign up and create a Roadmunk account using their Google account.
To sign up using your Google account, click the Sign Up With Google option on the sign up page. For existing users, please refer to our guide on adding new login methods to setup the option to login with Google on your account.
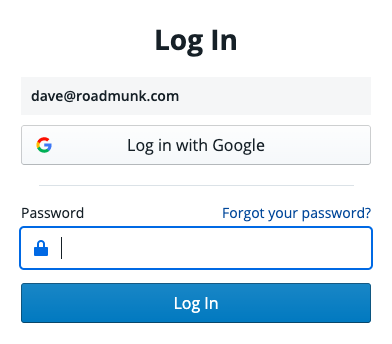
Once your Roadmunk account has been attached to a Google account, you will be able to log in using the Log in with Google button on the login page.
SAML Single-Sign-On
Available on the following plans:
Professional
Enterprise
Roadmunk supports using Single Sign-on (SSO) to login into the Roadmunk app. With SSO, a user can log in to their account using their SAML credentials from providers such as Okta and OneLogin. The benefit of using SSO is that users no longer have to remember a separate username and password combination for each app they use. It also provides an easy way to enforce your company's security policies, ensuring that users are only logging into Roadmunk using authorized methods.
Setup SAML SSO on your Roadmunk Account
Roadmunk has the ability to automatically produce and provide the required SP metadata file for simple, and self-serve SAML set up:
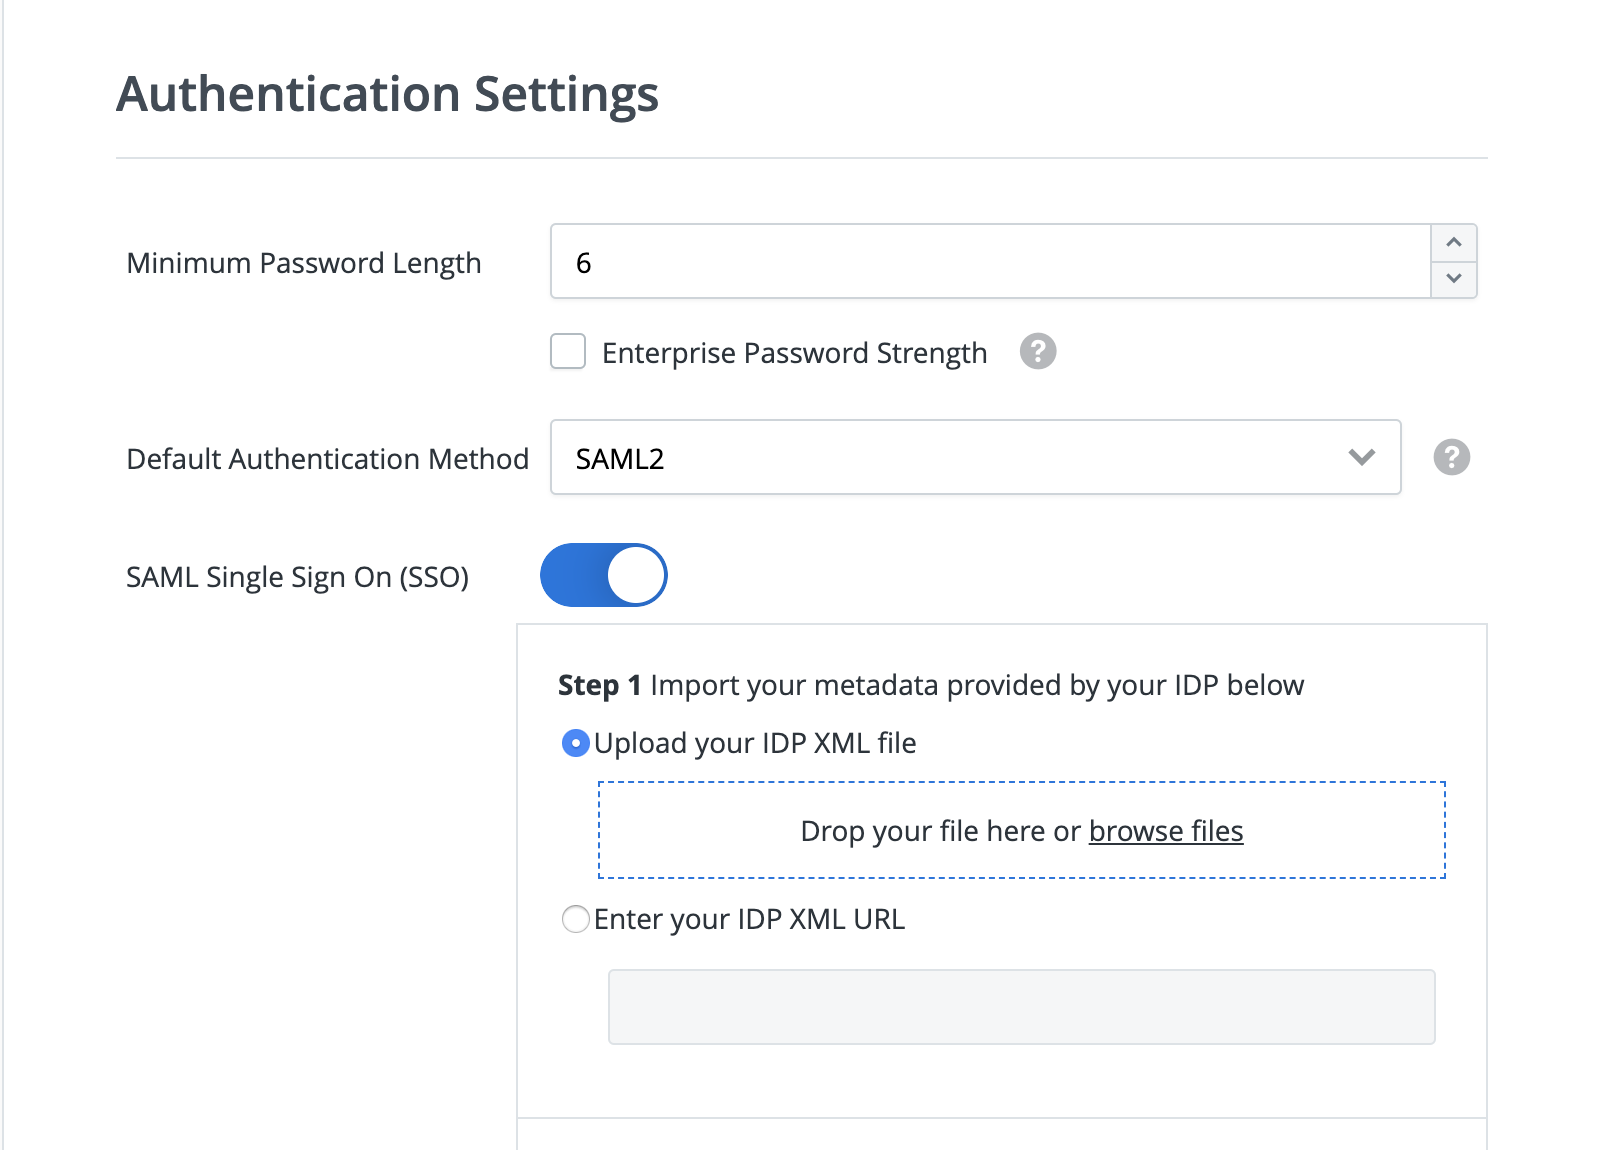
Navigate to the Company tab in your Account Settings dashboard
Under Authentication Settings, toggle SAML Single Sign On (SSO) on
Begin Step 1 and upload your IDP XML file or enter your IDP XML URL provided by your specific IDP (you must have already created a new application in your provider)
NOTE: In some IDP's there isn’t an integrated support for SAML so there’s no way to produce the XML file or URL to transfer into Roadmunk. If this is the case, please put placeholder text in temporarily until we provide the SP Metadata (this can be changed afterwards). The placeholder text must begin with "HTTPS://", and it is required in both the Audience URI (Entity ID) and the ACS URL (Single sign on URL). Additionally, the new application should be set up as SAML 2.0 type in the initial setup window.
Roadmunk will then automatically produce the required SP metadata file
Proceed to Step 2 and copy the information back into your IDP
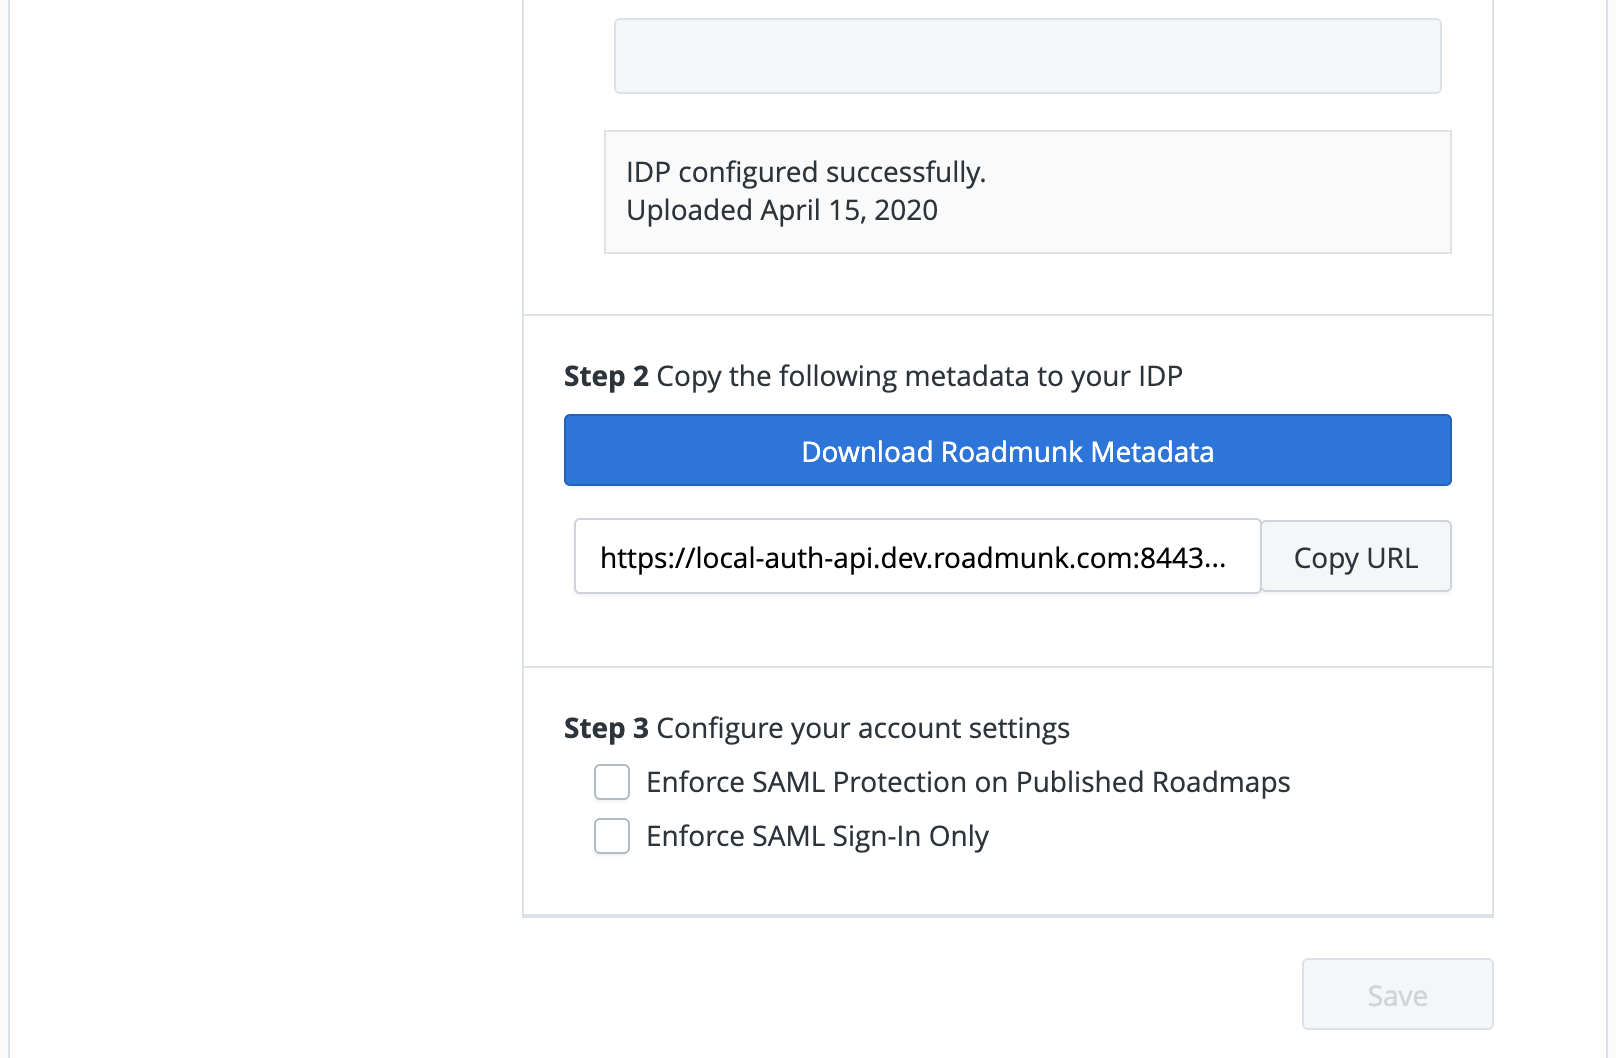
If your IDP application configuration supports uploading a metadata file, simply download the Roadmunk Metadata file and upload in your IDP
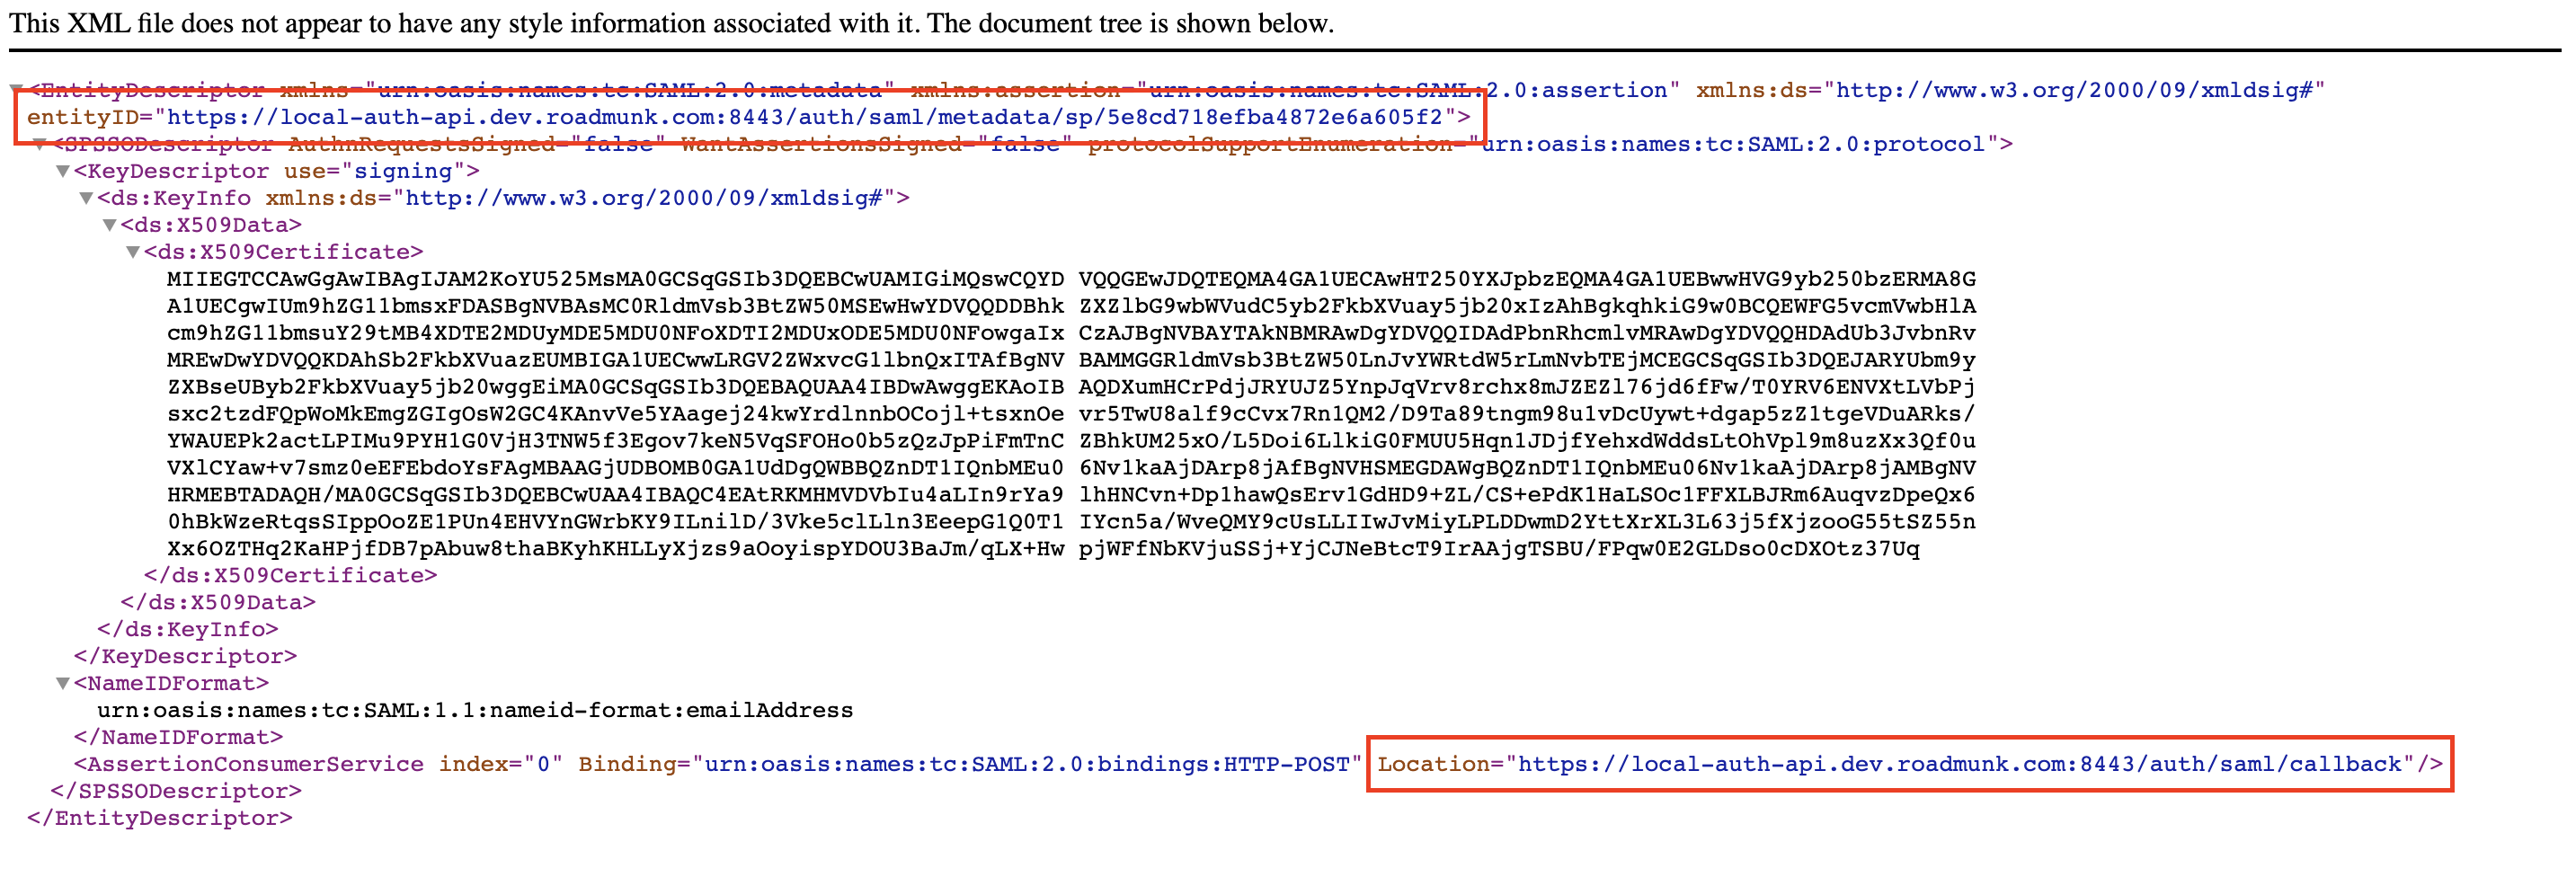
If upload is not supported (ex: Okta) copy the Roadmunk Metadata URL as there will be two values you will need to copy and paste into your IDP:
The entityID field will be inputted in the IDP Application field “Entity ID” or “Audience URI”
The "Location" inside of the AssertionConsumerService will be input in the IDP Application field “Single Sign On URL”, “ACS URL” or “Assertion Consumer Service URL”
NOTE: It is required to use Roadmunk’s SP metadata file and properly update your SSO to ensure setup is complete and functioning. For best results, send the entire SP Metadata file to your SSO administrator (some IDP’s have a more advanced setup and may require additional information from the Roadmunk data file).
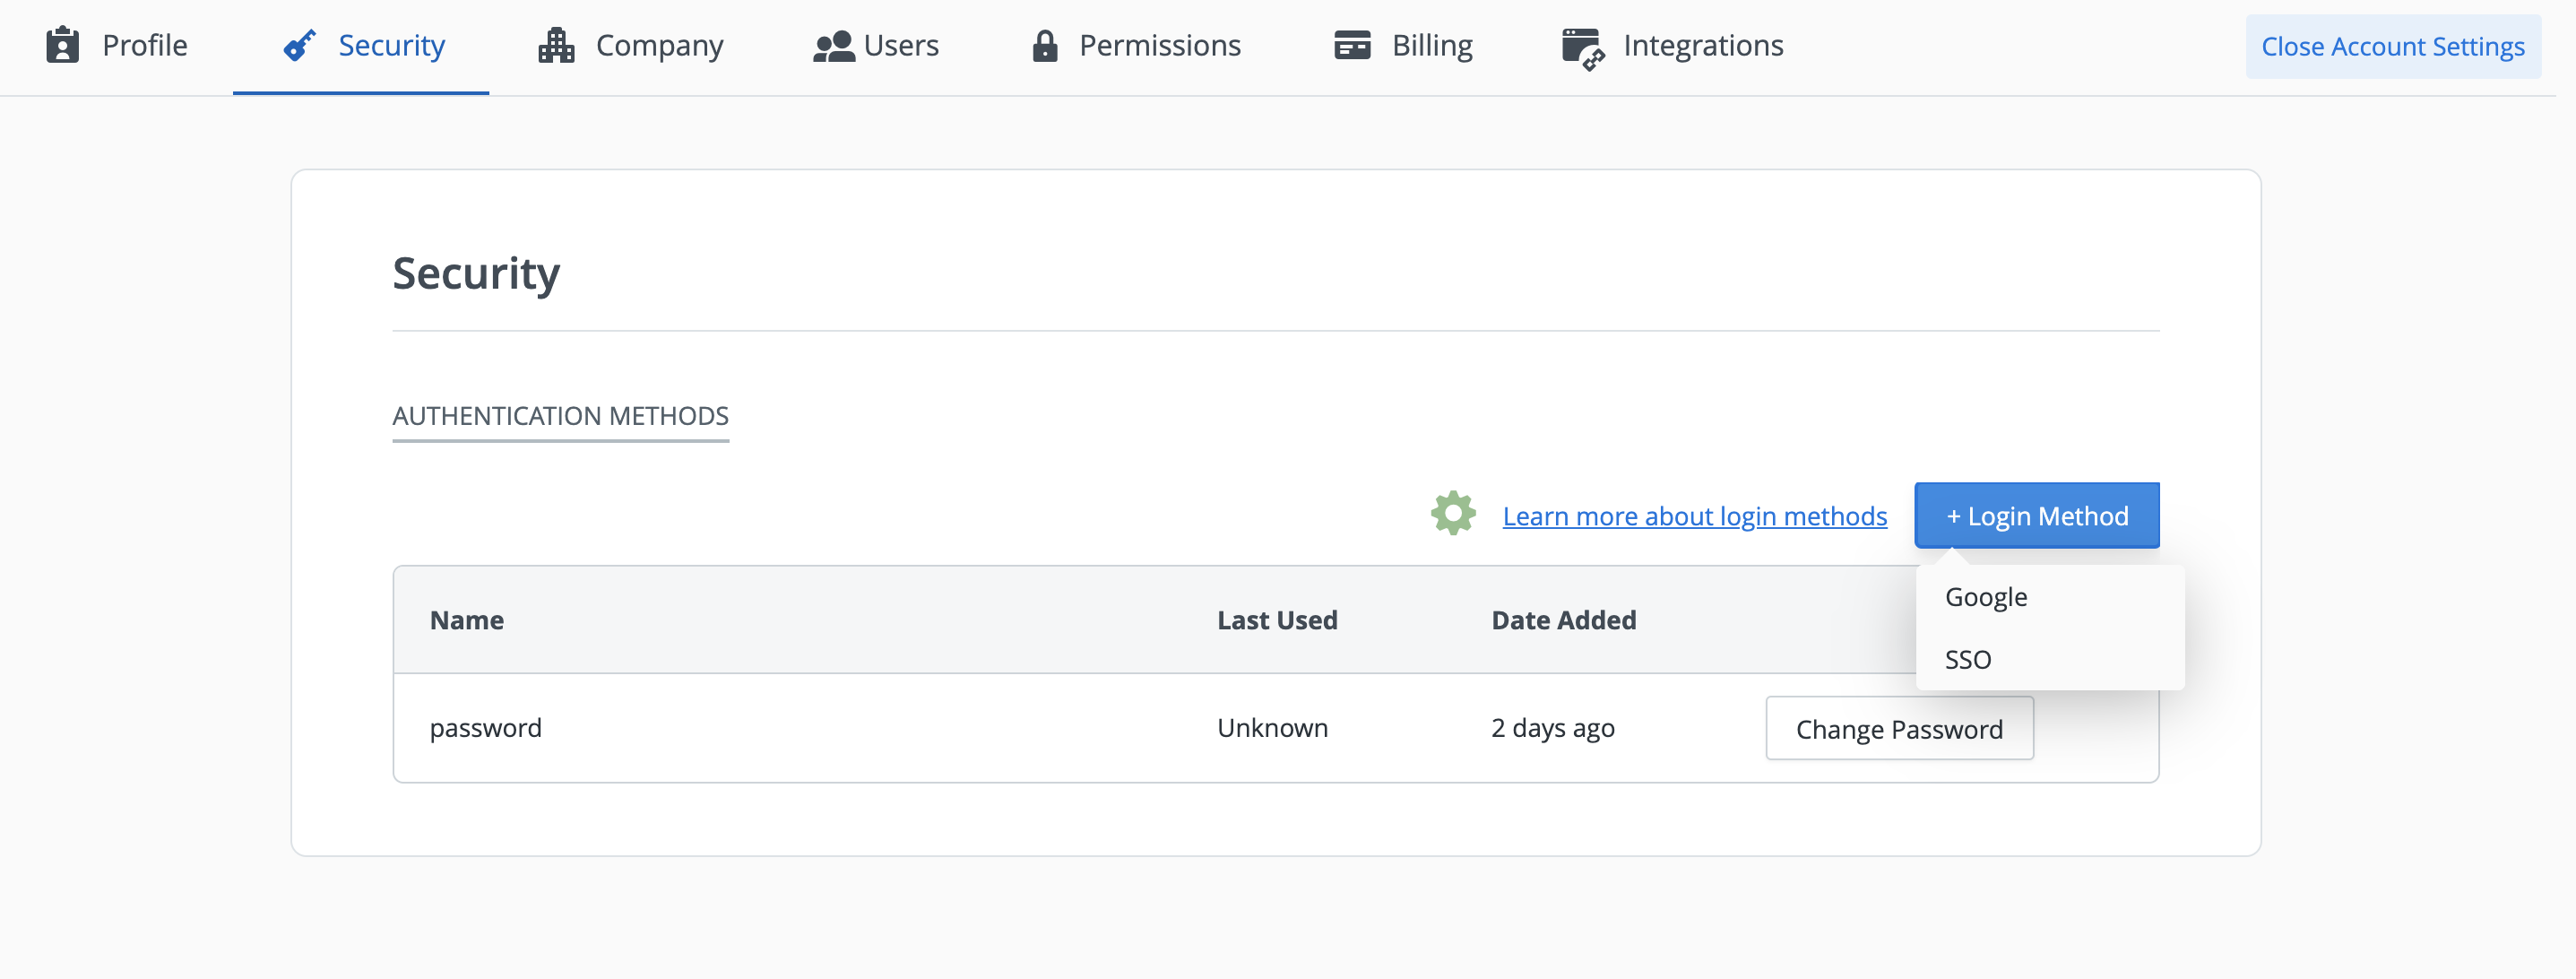
Navigate to the Security tab in Account Settings. Click + Login Method and SSO will appear as an option in the drop down menu
NOTE: You cannot proceed to Step 3 or change your default authentication method until SSO is attached as a login method.
Once you’ve configured SSO and attached it as a login method to a user successfully, proceed to Step 3 by navigating to the Company tab, and scrolling to Authentication Settings to configure the remainder of your account settings.
Logging into Roadmunk with SAML SSO
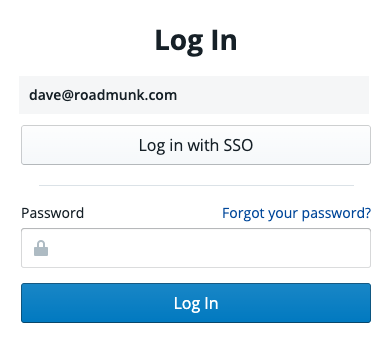
Once SAML SSO has been setup on your account, you and your team members can login to Roadmunk by choosing Log in with SSO on the login page.
NOTE: Users can perform an IDP initiated login by navigating to your application dashboard, clicking the Roadmunk application, and Roadmunk will open in a new tab.
Inviting users to an account with SAML SSO enabled
Roadmunk makes onboarding the rest of your team onto your account easy by ensuring they comply with your companies security policies, using only approved methods to login to the app. Team members invited to an account with SAML SSO enabled will be able to create an account using their SAML SSO credentials.

As an invited user:
Navigate to your inbox and find the invite email
Click the Join your team button
On the account creation screen, click Get Started
On the next screen, click Login with SSO, and provide your SAML credentials
Proceed through the remaining account creation steps
Enforcing SAML SSO authentication across an account
To ensure that users comply with company security policies, Account Admins have the option to enforce SAML SSO as the only login method users can use to access Roadmunk.
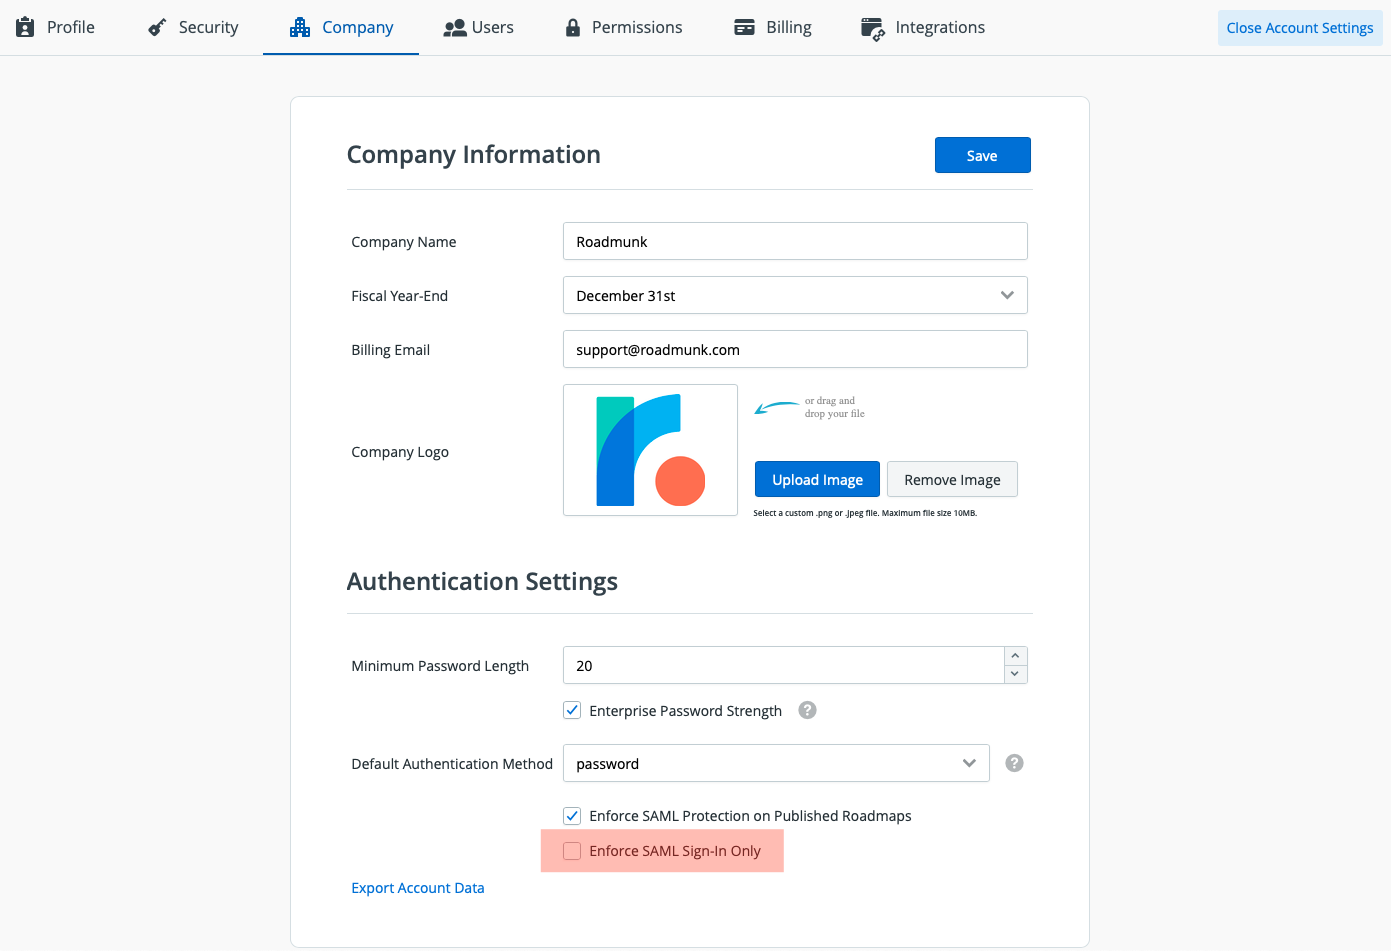
To enforce SAML SSO for all users once it's been setup on your account, navigate to the Company tab in your Account Settings dashboard. Under Authentication Settings, toggle the checkbox for Enforce SAML Sign-in Only (highlighted above) and press Save to enable or disable this option. Users will receive an email instructing them to click a link to setup SSO for their account
NOTE: Enforcing SAML will delete all other authentication methods on the account. The next time users access Roadmunk, they must do so through the Login with SSO button on the login page. Any users logged into the account prior to the account admin enforcing SAML, will receive an email with instructions on how to setup and log in to Roadmunk using their SSO credentials.
Choosing the default registration method for an SSO enabled account
Once SSO is enabled on your account, you will be able to choose the method for your newly invited users to register with by selecting either the Password or SAML option in the Default Authentication Method drop down.
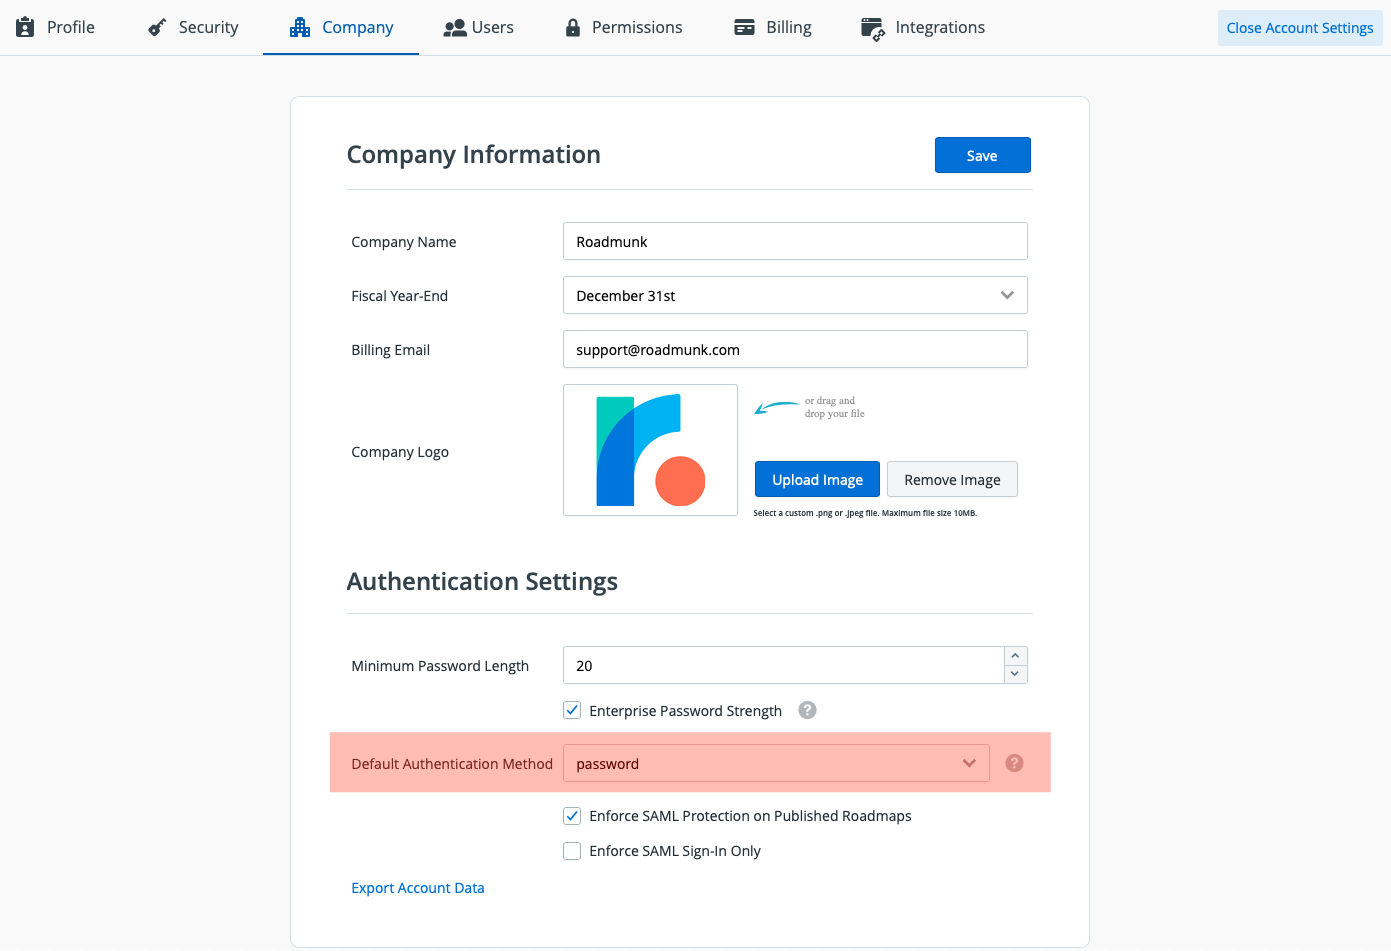
NOTE: If you utilize the "Enforce SAML Sign-In Only" toggle, then the default registration method will be forced to SAML SSP (password will not be an option for users until SAML Sign-In enforcement has been disabled on the account).
Please contact Roadmunk Support (support@roadmunk.com) for assistance with the following actions:
Updating IdP certificates
Changing SAML providers
Disabling Single Sign-On enforcement as the only authentication method (allowing users to sign in with other authentication methods—like username/password or Google—while continuing to support Single Sign-On)
Removing Single Sign-On as the authentication method on the account
Supported providers
Roadmunk supports several SAML providers including (but not limited to):
PingOne
Okta
SSO Circle
Bitium
OneLogin
AD FS
Azure
Provider-specific SAML SSO configurations
Okta
To get Roadmunk set up on Okta, click the Create New App button in the Add Application section of the Okta Admin dashboard and enter the following details:
Sign on method: SAML 2.0
App Name: Roadmunk
NameID format: EmailAddress
NOTE: SSO URL & Audience/Entity URL can be accessed in own metadata once downloaded.
Under Show advanced Settings set:
Response: Signed
Assertion Signature: Signed
Signature Algorithm: RSA-SHA256
Digest Algorithm: SHA256
Assertion Encryption: Unencrypted
Enable Single Logout: Unchecked
Authentication context class: Unspecified
Honor Force Authentication: Yes
SAML Issuer ID :http://www.okta.com/${org.externalKey}
For step three, leave the default options.