Cost Report
The Cost report for Jira Cloud costs for a certain period based on the hourly rates. You can also create and export a PDF invoice from the report.
This report is available for Accountants Groups users only (Auditors Groups if empty). If both settings are empty, the Cost Report is unavailable.
Setting up the Cost Report
In Cost Report, select Hourly Rates from the Configure menu.

In the Hourly Rates window, set a user or group rate with a date and a particular project.
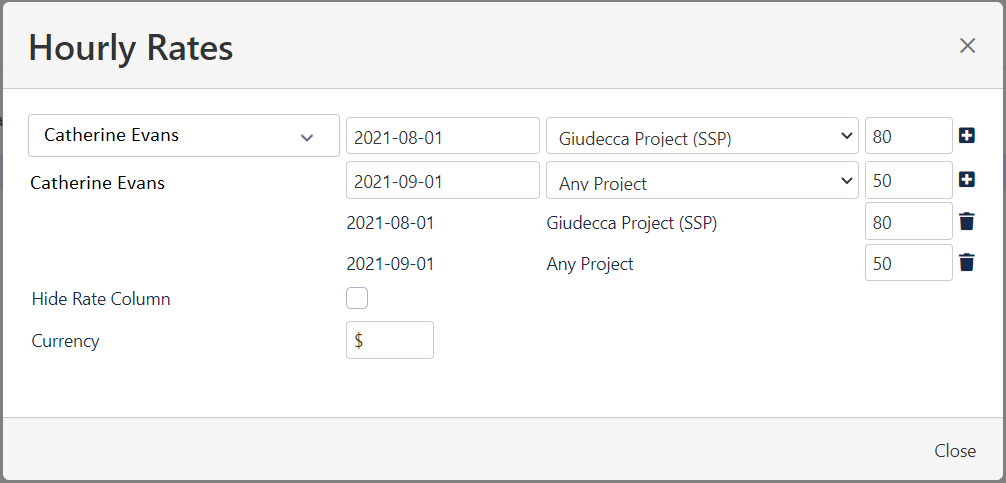
All settings are optional. For example, a default rate can be set with an empty project. A rate of zero can be added for a user or group for a non-billable project.
Select + to lock in the settings and add a new line to add another rate with different settings optionally.
Check the Hide Rate Column if you do not want to display the Hourly Rate column in the report.
In the Currency field, add the symbol to be displayed in the report.
Select Close and refresh the report page to generate the report with your settings.
Element | Description | Details |
|---|---|---|
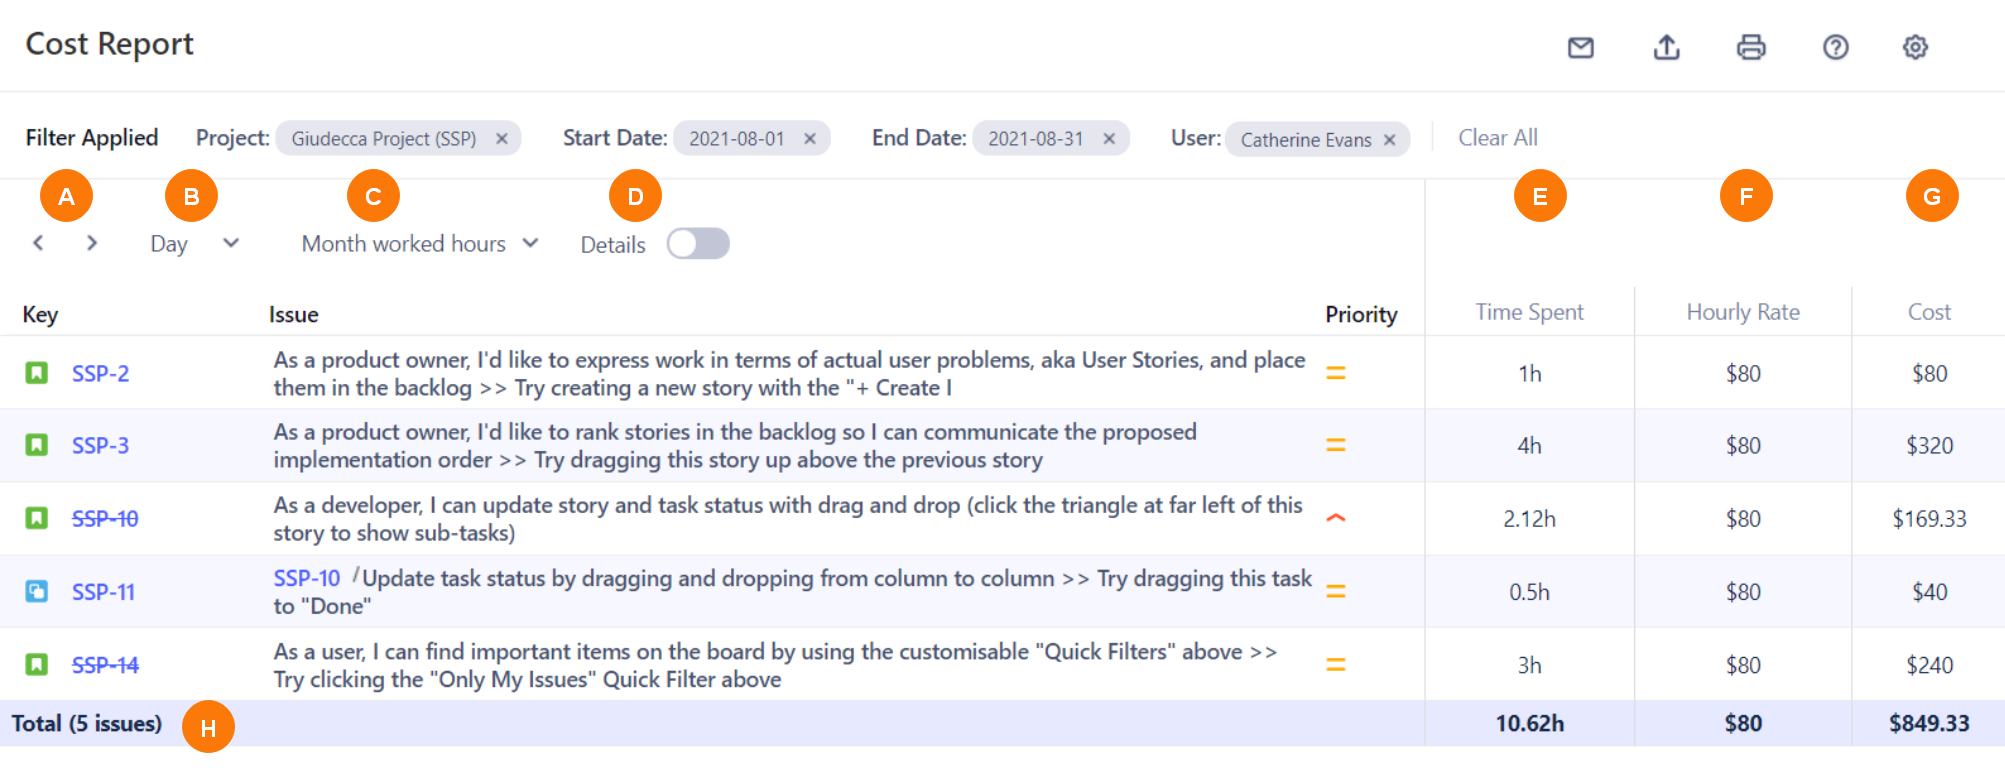
A | Previous and Next icons | Select to scroll to the previous or next week. |
B | Time display dropdown | Select to display the day, week, or month. |
C | Worked Hours dropdown | Select to display the daily, weekly, or monthly worked hours. |
D | Original Estimate column | Displays the initial estimated time specified in the issue field. |
E | Time Spent column | Displays the sum of worklogs for an issue, during the period selected. |
F | Hourly Rate column | Displays the hourly rate, as set during the setup of the report. |
G | Cost column | Displays the total cost for the issue (Time Spent x Hourly Rate). |
H | Total row | Displays the totals for time spent, hourly rate, and cost for the displayed table. |
Exporting an invoice from the Cost Report
After your Cost Report is set up and populated with correct data, you can export the report as a PDF to use as an invoice.
With the Cost Report selected and displayed, select invoice.pdf (pdf) from the Export/Import menu.
Edit the header and footer with your information, such as client name, address, and banking info.
Select Save, and then add a name and location to save the PDF.
The header and footer information is stored in a saved view for you to re-use it. To re-use the information, select Invoice in the Saved Report section of the Report list.