Overview of Products & Components
Product Managers know that Feedback can be provided at any time across many different channels, but one of the hardest parts of working with feedback is making sure that the information is being directed to the appropriate person or team within your organization.
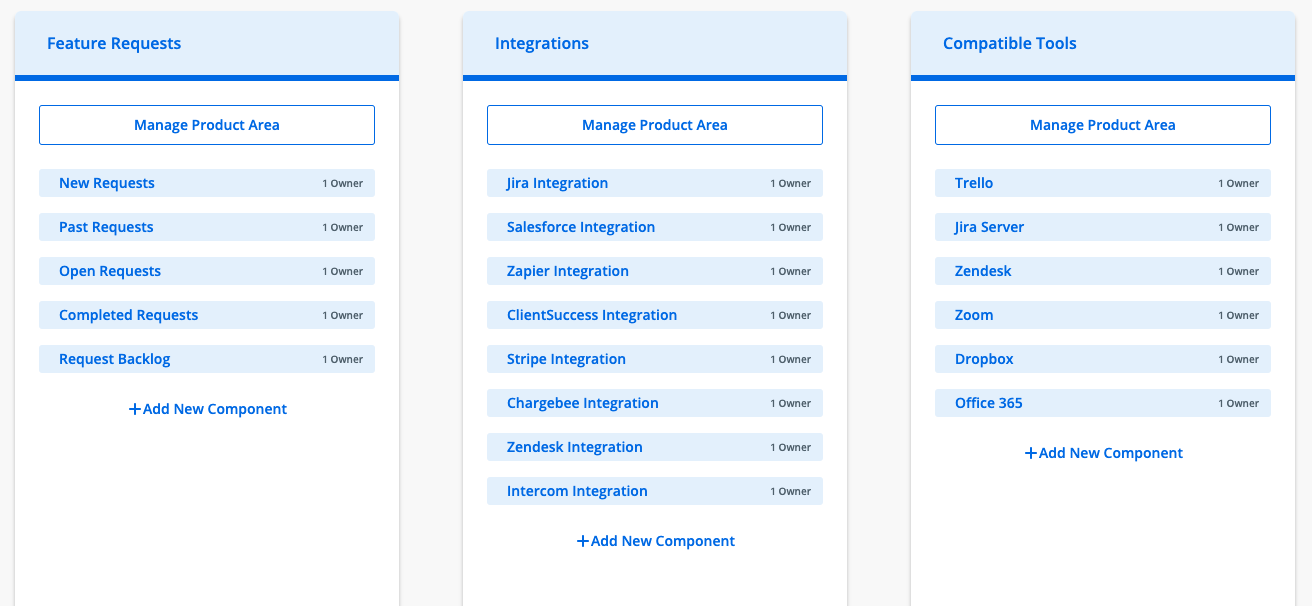
Products & Components allow you to direct your feedback towards the right people in your organization, with Products being the more high-level category that defines your overall product and Components being the integral pieces that define or make up that specific product. To use Strategic Roadmaps as an example: if our Roadmapping Module was the Product, then the Components may include the Items Table, Timeline View, and Swimlane View.
Locating the Products & Components Menu
From the Feedback module:
-
Click into the Product Area drop-down in the top-right corner of your Feedback Inbox
-
Click into Manage Products and Components
Creating New Product Areas
From the Products and Components menu:
-
Navigate to the empty product area card in your Products and Components menu
-
Click the header option labeled + Product Area (** remaining) to create a new Product Area
-
Once clicked, you will be able to name the new product area in the text field that appears
-
Click anywhere outside of the product area name or press Enter to save your changes
-
The name of this product area can be updated at any time by clicking Manage Product Area
From the Enter New Feedback form:
-
Open the Product Area drop-down menu in the top-right corner of the form
-
In the drop-down, click into + Create a new product area at the bottom of the menu
-
In the window that appears on-screen, enter the name your new product area
-
Click the Create a New Product Area in the bottom-right corner to save your changes
NOTE: The number of product areas that you can create is limited based on your plan. For more information on this, please visit the pricing page to explore plans with additional product areas.
Creating New Components within Product Areas
From the Products and Components menu:
-
Navigate to the Product Area associated with the Component you're looking to add
-
If components are still available, click + Add New Component in the Product Area card
-
Once clicked, you will be able to name the new component in the text field that appears
-
Click anywhere outside of the product area name or press Enter to save your changes
-
The name can be updated at any time by clicking into the Component from the Product Area
From the Enter New Feedback form:
-
Open the Product Area drop-down menu in the top-right corner of the form
-
In the drop-down, click into + Create a new product area at the bottom of the menu
-
In the window that appears on-screen, toggle to the Component tab
-
In the first drop-down, select the Product Area associated with this new component
-
In the New component field, enter the name of the new component
-
Click the Create a New Component in the bottom-right corner to save your changes
Number of Available Products & Components
Product areas support up to 50 components per area, and users from all Strategic Roadmaps packages above the Starter package will be able to create up to 50 product areas to house those components.
Managing Product & Component Ownership
To manage the owners of specific Product Areas:
-
Navigate to the Products and Components menu
-
Locate the product area you want to update and click the Manage Product Area button
-
Click into the Product Area Owners field and select up-to 10 owners for this product area
-
Click the Save button in the bottom-right corner to save your changes
To manage the owners of specific Components:
-
Navigate to the Products and Components menu
-
Locate the associated Product Area, then click into the component's name
-
Click into the Product Area Owners field and select up-to 10 owners for this product area
-
Click the Save button in the bottom-right corner to save your changes
Removing Product Areas and Components
To remove a Component from a Product Area:
-
Navigate to the Products and Components menu
-
Locate the associated Component within the Product Area, then click into the Component
-
In the modal window that appears, select Delete Component
-
In the warning that appears, select Delete
NOTE: All feedback previously sent to the Component that's being deleted will be moved up one level to the associated Product Area.
To remove a Product Area from your Products & Components menu:
-
Navigate to the Products and Components menu
-
Locate the product area you want to remove and ensure that all Components are removed
-
In the Product Area card, select Delete Product Area
-
In the warning that appears, select Delete
NOTE: All feedback previously sent to the Product Area that's being deleted will be moved up one level to the All Products area.