Introduction to Customers & Contacts
Customer profiles and the contact information associated with them are all located in the Customers module. When creating Feedback, users are required to assign either a customer or a specific contact for that customer to the feedback they're submitting.
Assigning customers to your feedback ensures that your team will be able quickly and easily locate customer feedback, determine customer needs and pain points, and easily relay updates on new solutions or enhancements back to your customers with minimal friction.
A company profile for your and your team will be automatically generated in the Customers module for your team based on a list of active an inactive users on your account, and will be automatically updated as your account continues to grow. This way, you can ensure that any feedback coming from an internal source is captured and assigned appropriately.
In this article, we'll break down the various ways that users can create customers and contacts from inside the application.
Setting Up Customer & Contact Details in Strategic Roadmaps
Adding Customer & Contact Details from Strategic Roadmaps Customers Module
To add new customers from the Customers module in Strategic Roadmaps:
-
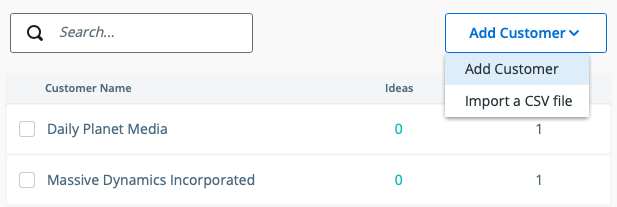
Select the Add Customer button in the Customers module
-
From the drop-down menu, select the Add Customer option to open the Customer Details
-
In the Customer Details panel, click the New Customer title and enter the customer's name
-
Changes made to the customer's name will save automatically when you click out of the field
To add Contacts under this Customer:
-
Click the Add Contact button in the Customer Details panel
-
In the New Contact window that appears, enter the contact's First Name, Last Name, and Email
-
To save the contact details, click the Create button at the bottom of the window
-
Contact details will automatically populate in the Customer Details panel
-
Repeat these steps as needed for any additional contacts
Adding Customer & Contact Details from a CSV File
To upload a list of new customers and contacts from a CSV file in Strategic Roadmaps:
-
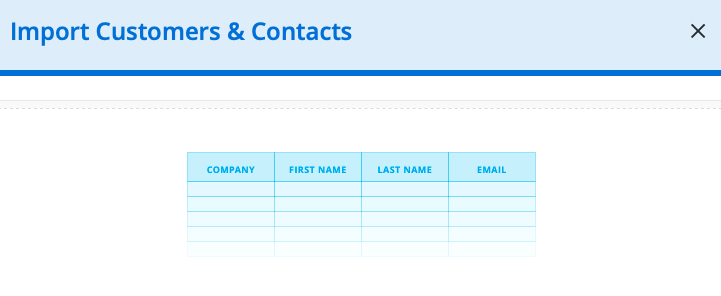
Ensure that your CSV file has the following four headers in this order:
-
Company
-
First Name
-
Last Name
-
Email
-
-
Input Customer & Contact details into their appropriate columns
-
From the drop-down menu, select the Import a CSV option option
-
In the Import Customers & Contacts panel, drag-and-drop or upload your CSV file
-
Customer and Contact details will populate once the CSV file has finished uploading
Adding Customer & Contact Details from the Feedback Submission Form
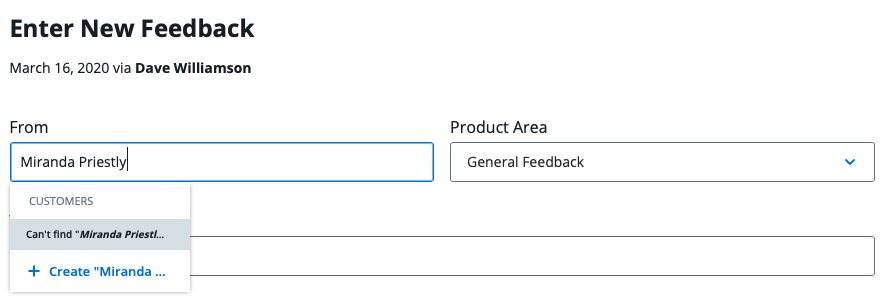
To add new Customers & Contacts from the Enter New Feedback form:
-
Enter the Customer's Name into the From field
-
Select the + Create "________" option at the bottom of the drop-down
-
The Customer name will auto-populate in the New Customer window
-
If applicable, enter the Contact info in the section below the Customer name
-
When ready, click the Create button at the bottom of the New Customer window
-
The details you entered will auto-populate into the From field on your new feedback
To add a new Contact to an existing Customer from the Enter New Feedback form:
-
Enter the Contact's name into the From field on the Enter New Feedback form
-
Select the + Create "________" option at the bottom of the drop-down
-
In the New Customer window, click into the Customer Name field and enter the correct customer name
-
Enter the Contact info for the new contact in the fields below
-
When ready, click the Create button at the bottom of the New Customer window
-
The details you entered will auto-populate into the From field on your new feedback
-
The Contact you created will be saved under that Customer Profile for future use